During development I often create test websites or pages to test new implementations or new frameworks. After creation the simple way to test the website is to add the site to the local IIS server and to assign a hostname to avoid remembering a specific port. This works great but you still have to add the hostname to your host file (c:\windows\system32\drivers\etc\hosts) and point it to the loopback address (127.0.0.1).
When I started to read the article Configuring your ASP.NET application for Microsoft OAuth account on the MSDN blog site one of the first items was to use a test domain. Without reading further I was already configuring IIS with a new custom host name for that specific site. After creating the site I read the item completely and discovered the localtest.me service.
This neat little service pointed all localtest.me domain names to 127.0.0.1. And they used the wildcart ‘*.localtest.me’ so you can choose any name you want. With this service setting up a test site is as simple as configuring your site in IIS.
Configure IIS for localtest.me
Open up IIS and create your site like you always do. Open up the bindings screen and add any hostname ending on .localtest.me.
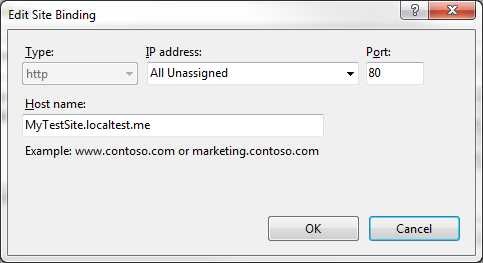
After clicking ok, you can simply browse to mytestsite.localtest.me and your local website will appear.
Credits
Credits off course for Scott Forsyth and Imar Spaanjaars who came up with this idea.
More info on: localtest.me
SSL
Be sure to read their remarks on SSL before trying to test a local SSL configured site.
I’d like to find out more? I’d like to find out more details.