Category Archives: ASP.NET

Automatic deploy your website from Teamcity to Azure

Deploy to Azure from Visual Studio

The tooling in Visual Studio is great, you can easily deploy from Visual Studio to file, servers, Azure, Docker, … Deploying to Azure is as simple as downloading a publishing profile from the Azure portal and import it into Visual Studio.

There are more the enough resources on the web that give you excellent guidance on how this actually works and is out of scope of this blog post.

For one of the projects we are working on, we’ve created a middle tier for an existing REST service. Due to the lack of logging and being hosted on unreliable hardware we’ve decided to create our own REST service and host it on Azure. This will give us a 99% uptime and increased logging experience we’re we and the customer can benefit from. During the development fase we wanted automatic tests to check if our new middle tier is returning the same results as the original REST service.

Part of this test is the automatic deployment to Azure. The project itself is built on every check-in to our source control on our internal TeamCity build servers. If the build is successful we wanted to automatically deploy it to our Azure account. When the service will be used in production we want to deploy to a staging environment first and then promote it to the production environment, both hosted on Azure.

Existing resources

I was convinced it was an easy peasy task to deploy from Teamcity, we already use webdeploy to deploy our projects to internal IIS servers, changing that to Azure should be a walk in the park. As you can imagine, I wouldn’t take the time to write a blog post about is if it was just a 1, 2, 3 step process.

Although you can find different guides on the web, even on the TeamCity confluence page from Maarten Balliauw (https://confluence.jetbrains.com/display/TCD8/Continuous+Delivery+to+Windows+Azure+Web+Sites+(or+IIS)), it all seemed or out dated or just to much hassle to get configured quickly.

After some trail and error (a lot of error, most of them with general error messages…) and searching in log files it actually is not to hard to set up.

Step by step

Getting publishing credentials

First step would be to log in to the Azure portal to download the publishing profile. We are going to need the data that’s in that profile.

image

(Apparently it is not so clear to change your language in the Azure portal, the screenshot is from the Portal in Dutch, but the English version should look similar).

You can open the downloaded profile with any text editor as it is just XML. In the screenshot below you’ll find an example (I had to obfuscate some data)

image

The data you’ll need in the next steps (with off course the correct details):

  • publishUrl: YOUR_PROJECT.scm.azure-mobile.net:443
  • msdeploySite: YOUR_PROJECT_WEBSITE
  • userName: $USERNAME
  • userPWD: A_VERY_LONG_PASSWORD

Set up TeamCity

To set up a new project I refer to the TeamCity manual, we’ll focus on the actually steps to get the website deployed.

We first set up 2 simple build steps, one to install the Nuget packages and one to build our solution on Release configuration.

image

Simply add these steps and select your projects .sln file. We’ve installed Visual Studio 2017 SDK on our build agents but this should also be working on the 2013-2015 SDK.

Because we have a solution with multiple projects, we add an extra build step to just deploy the Web API (REST) service without interference  from the other projects in this solution.

Add a new build step and choose for MSBUILD. Select the .csproj file from the correct project. The key to set up the webdeploy is to add the correct parameters to MSBUILD. In the command line parameters add the following parameters:

You’ll see the parameters hold the data we retrieved from the publishing profile. Just one note, I’ve put every parameter on a new line to be better readable. When adding these parameters be sure to avoid line break and extra spaces! I’ve spend more then one occasion bug hunting for a lost space or line break!

Be sure to enter the URL found in the publishing profile at the MsDeployServiceUrl parameter. It had got me confused because webdeploy to IIS uses a full URL like “https://YOUR_SERVER:8172/msdeploy.axd”. So lose the https and the axd reference and copy the correct value from the publishing profile.

You can now run your build on TeamCity and if everything goes well, your website or project should be automatically be deployed to Azure. You can add triggers to do this on each check-in or at a certain time daily.

Every developer can see the credentials

Depending off course on the user settings in TeamCity the credentials you have added in the parameters of the MSBUILD step are readable by every developer. This is off course especially for production environments not safe.

image

To avoid this security breach we can make use of Parameters in the Team City build server. Open up your build configuration and go to the tab Parameters and click the add new parameter button.

image

Add a new “configuration Parameter” with name “deployUser” and value “$USERNAME”.

image

To avoid that this parameter is visible, click the edit button and select in the popup for type “Password” and by display for “Hidden”. You can add a label and description but that’s not obligated.

image

By setting the type to password you avoid the parameter to be displayed in log files and setting screens. Click save twice and add an new parameter for the password with the name “deployPassword” and the correct value.

Now go back to our MSBUILD build step in TeamCity and alter the Command line parameters.

Alter the username to %deployUser% and the password to %deployPassword%. On build time TeamCity will insert the correct values. Colleague developers will only see the %% parameters in TeamCity.

image

image

Conclusion

It is actually not to hard to set up in TeamCity. The only problem is that the resources are not that clear when first looking for information. Little differences with using WebDeploy to IIS servers makes it error prone while setting up.

Once set up you can use the same solution for your staging, acceptance, test, production, … environments, just change the parameters.  

Personal DEVIntersections review

It’s a fast moving world for software developers. New frameworks, functions, possibilities, are rising up almost every day. Although you can find many resources online in different formats (blogs, videos, live coding, …) it’s always an advantage to attend a conference where you can learn the new stuff and meet up with some of the leaders of the industry.

Until 2014 Microsoft organised an European Teched conference but decided to stop with the Teched at all (also the North America edition) and focus on their BUILD conference. Due to a lack of an European alternative we tried to get tickets for the BUILD conference in San Francisco this year but you have better luck trying to buy U2 tickets for a small venue. Luckily we noticed the DEVIntersections conference in Orlando that takes place only a 3 weeks after the BUILD conference and  with an impressing line up of speakers.

Now the last day of the conference is arrived, is it time for a little wrap up. Please note, these are my personal findings not only about the technical items from the conference but also travel, stay, hotel, …

Long way from home

Not really a downside, but it’s reality that the travel from Belgium to Orlando takes a while. It’s not my first visit to the States so I did know what to expect. Due to the terrorist attacks on march 22 in Brussels our flight was diverted to Schiphol what led to some extra travelling. From the moment I’ve parked my car in Berchem till we entered the hotel a 20 hour trip was finished and has taken us from a train ride to Schiphol, an 8 hour flight to Atlanta, a 2 hour flight to Orlando and an 45 min taxi ride to the hotel.

Disney World

The conference takes place in one of the Disney World hotels, the Walt Disney World Swann and Dolphin. And the hotel is huge! You can’t compare with any hotel you find in Belgium (or the parts of Europe where I travelled before) and due to the Disney park, it houses a mix of different conference attendees (and yeah, you can pick the IT dudes out of the crowd Glimlach) and families ready for some days of Disney fun.

The room was fairly standard but clean and comfortable. A bit a pity of the view as we’re just above a roof of one of the adjusting buildings of the hotel. But once you step outside the room and start walking around you are directly in vacation atmosphere. You have the 5 different swimming pools, different hot tubs, 7 or 8 different restaurants in the hotel complex, the Disney Broadwalk around an artificial lake, boat trips from one side to the other, …

Fun for the first days, but after a while you have seen it all. Plans to go to downtown Orlando, we didn’t travel that far for just the Disney magic, weren’t realistic by the lack of fast public transportation and the cost for a taxi fair in combination with the time we could spend downtown after a day of conference.

DEVIntersections – the workshops

Next to the conference itself, they also organised 4 days of workshops and hands on labs the days before and after, where we registered for the 2 days pre work shops that are titled: ‘Making the Jump to ES6 and TypeScript’ and ‘Building Single Page Applications with Angular 2’.

I’ve only been looking into Angular (1.4) and Typescript shortly so the workshop was very interesting. Learned a lot about Typescript and how it can construct and organize your codebase on a much better way with a lot of advantages. Certain something to look further into.

After the first day of Typescript introduction, you notice on the second day how it perfects integrates with Angular 2! A lot of new stuff was thrown at us and it will take me some time to digest all that information but it’s a very good base to start building Angular 2 apps in the future.

Both work shops were presented by John Papa (John_Papa) and Dan Wahlin (DanWahlin), both experts in these matters. You could notice they worked together before as they seamlessly took over from each other and were joking around without falling into a comedy show. 

Although it was announced as a “hands on” workshop, the “hands on” moments  where few and maybe there should have been more time for the attendees for trail and error on their own machines, especially for an all day workshop.

Note to the organisation itself, if you ask attendees to bring there own device, please make sure there are power sockets for those people. More then half of the attendees ran out of battery before lunch and were unable to use their machines for the rest of the workshop. We were so wise to come early the second day and choose one of the few places where there was a power socket in reach.

DEVIntersections – the sessions

The conference content was of a very good level! Most of the speakers are the experts in their field and many Microsoft employees stood on stage. You could notice there were a lot more attendees then the first days during the workshops but still it wasn’t too busy. Not too much queues (except at the men’s rooms during breaks Glimlach, the ladies still have a huge advantage on these IT events).

The first keynote was by Scott Guthrie (scottgu) and was a general overview about Azure and could be in my opinion a lot wider and a bit more developer focussed instead of the commercial tone.  The videos shown were the same as shown on the build conference but that was to be expected.

The second keynote on the first day was from Scott Hanselman (shanselman). You can’t always predict what he’s going to talk about, but you can at least be sure it’s a good mix of technical innovations an a lot of humour. I’ve also went to the other session that was presented by him and on both occasions it was top notch entertainment with a lot of new exiting things that are coming our way. He’s not afraid to point out where there are still some improvement opportunities for Microsoft but is straight on about where the the different teams of Microsoft are focussing on at the moment. He managed to install the latest development version of Visual Studio on one of the attendees his laptop, who had surprisingly no Visual Studio instance installed??? While trying to connect the laptop, bringing in the technical fellows, he managed to bring that without boring for 1 second.

The last day of the conference was lacking good interesting sessions for me what gave the feeling all was said during the first days. Except some 3rd party frameworks like NodeJS and ReactJS there were not many full developer sessions that were based on Microsoft technology except then the keynote about Sharepoint. (what gave me the time to write this post Glimlach).

But overall good content, excellent speakers and we picked up a lot of new things. If I find the time, I make a follow up post.

DEVIntersections – social

Maybe I’m a bit spoiled by the Tech Ed conferences and the Xamarin Evolve conference I attended in November 2014 but I missed the social parts that makes a good conference a wow conference.

For one, the sponsors expo was limited. With 10 company stands there was not so much to see or to speak about. The boots were small as the expo took place in the hallway between the different rooms.

Ok, a bit childish but there were not so many goodies to find. On previous occasions I’ve been able to make my son very happy with a bunch of goodies that I’ve taken with me from the exhibitors expo. 

There were 2 evening gatherings (if I didn’t miss one, but saw no other in the schedule or announcements). On Tuesday the opening of the partner expo with drinks and snacks. It’s a pity they just gave one coupon for a drink and not so many snacks. Because there was only one drink included, the reception was over quite early as everybody went to somewhere else.

I didn’t went to the after dark sessions on Wednesday but the general feedback from the people I spoke, wasn’t that overwhelming and many bailed out during the session.

As other conferences were held in the same hotel complex, you could see the difference. We’ve saw at least 3 beach parties with open bar, music, a lot of people and seemed to be a good atmosphere. It would have been great if DEVIntersections had organised one of those.

DEVIntersections – General

Overall it is a good conference with some grow opportunities on their way. Off course Rome wasn’t build in one day, and DEVIntersections is a very young conference. I’ve enjoyed my stay in Florida and learned a lot of new interesting stuff. I’m a big fan on how Microsoft is proceeding and it will be challenging times for aswell Microsoft as the developers using their stack to create excellent apps on different platfoms, mobile, web, desktop, cloud, IoT, …

Create an installer for website with WIX, part 1

For a customer we created a new web application in MVC4 with an underlying SQL database. One of the requirements was to provide an installer to install this website at their customers local installations. The installer had to do a few tasks:

  • Install the .NET 4.5 framework if that isn’t installed already
  • Install the MVC 4 framework if that isn’t installed already.
  • Create a folder and copy all needed files to run the application
  • Create a new database on an existing SQL server and prefill the database with the correct tables and values. (the connection details and database name should be entered by the end user running the installer)
  • Create a new website in IIS 7.5 (create website and application pool running under .NET 4.5)
  • Alter the config file so the correct connection settings are used (entered by the end user)

From Visual Studio 2012 on there is no Windows Installer project available any more. You can use the InstallShield Express edition with limited capabilities or the Windows Installer XML (WiX) open source package created by Rob Mensching when he was working for Microsoft. (It’s actually the oldest open source project from Microsoft and now under the OuterCurve foundation)

The Installshield express version doesn’t support IIS installations and falls out of the boat. WiX does support all actions that we have to do but has a steep learning curve. I used WIX in a previous project and still had some hassle to put all of it together. This series of posts will walk us through the creation of the installer.

Start project

Start by downloading the WiX toolset from http://wixtoolset.org/releases/. For this demo I used the 3.8.826.0 version. This is not the latest stable published release but I haven’t got any problems with this version.

Next step is creating a MVC 4 web project and choose for an internet application so we have some default files (javascript, css, views, controllers, …).

Right click on the solution in the solution explorer and choose to add another project. In the ‘Add New Project’ dialog select Windows Installer XML on the left hand side. Choose for ‘Setup Project’ and click the OK button.

image

You should get a new project with only one file (Product.wxs).

WiX flow

WiX source files are written in XML and have the wxs or wxi (for variables) extensions. Those files have to be compiled to wixobj files. This can be done in Visual Studio or by command line by using the candle.exe tool in the WiX toolset. After compiling the wixobj files another tool is needed to create the msi (installer) file, the light.exe tool.

The most simple installer can be created by just using one wxs file. You will notice that it will make your project more clear to use different wxs files. One for every part of the installation.

You can use the default UI that is available in the WiX toolset but with bigger projects (and in this demo) you can create your own UI and flow. Even the UI is defined in XML and has the same wxs extension. Another reason to split up your installer code in different files to keep the overview.

Step 1: install all needed files

Open up the Product.wxs file in Visual Studio. You’ll see already a few standard values filled out.

At line 3 you get the product attributes that have to be set. Leave the asterix ( * ) at the Id tag. WiX will replace this with an unique Guid when compiling the source. Set the version, language and the name to the desired values.

IIS default location for websites is the c:\inetpub directory. We’ll alter the installer so this default location is used. In one of the next chapters we’ll be able to change this folder. Navigate to line 15 and alter the Directory tag.

You’ll see I’ve changed the default InstallFolder to Inetpub. (from c:\Program Files to c:\Inetpub). This is all we have to change for the install location.

On line 26 you’ll see the ComponentGroup where we’ll have to define all files that have to be installed in our installation folder. Let’s start with adding some files. In the example below I added 3 files in the root of out application (favicon.ico, web.config and global.asax). To add the bin folder I had to add a new ComponentGroup, a new Component, and a new Directory element before I could add the files (2 dll’s).

As you can see this is a tedious job to add every file you want to be installed. Luckily there is a faster way to create this.

Use the heat component from the WiX toolset

The WiX toolset has another tool heat.exe that can help us to harvest all files that we need to install. Although heat was incorporated in Votive (the Visual Studio environment for WiX) in earlier versions, in the 3.7 – 3.8 version this is not available in Visual Studio.

MSBuild to the rescue

If we want to make use of the heat component we’ll have to script it. We can create a bat file we can run every time before we build the installer or we can create an MS build script that we can run. The MS build script has the advantage that we can reuse this script for out build server (continuous integration).

Create a new text file in the Setup project and rename it to setup.build. First we’ll add some properties in a ‘PropertyGroup’: the source of our website and the name of the WiX file we want to build. We also include the path where we should publish all files. In the ‘itemgroups’ we define the temporary files witch is the content of the web site and the list of WiX input files.

Add build target

We first have to build our website so we are sure we have the latest build we are deploying. Therefor we add a target in the MS build file

Add Publish website target

We’ll use the build in publish feature of MS build to deploy the website to a new folder so we have only the files we need. (and not the .cs files etc)

Harvest the files in WiX

Now that we have all the files we need under a temporary folder we can use the heat.exe tool in the WiX tool belt to harvest the files and create a wxs file.

The parameters used in this command:

  • dir $(Publish) tells to harvest a directory (our published website)
  • -dr:  The directory where the files have to be installed to
  • -ke:  Keep the Empty directories
  • -srd:  Suppress harvesting the root directory as an element.
  • -cg: The ComponentGroup name that have to be used
  • -var var.publishDir: Will substitute the source directory with a wix variable so we can use $(var.publishDir)\myfile.txt in the wxs files
  • -out $(WebsiteContentCode)  the file we want to be created (see PropertyGroup settings)

Test the script

With the heat command inserted we can test our script. Open up a Developer Command Prompt for VS2012. Change the prompt to the DemoWebsite.Setup project folder and type the following command:

msbuild /t: Build;PublishWebsite;Harvest setup.build

and hit enter. If everything goes well you’ll see a lot of command coming by. The script will create a folder Setup\publish under the root and publish the website. At last a WebsiteContent.wxs file will be created in the setup project folder.

If you open up the WebsiteContent.wxs file you’ll see all files and folders are added with their own Id under a ComponentGroup MyWebComponents.

If you looked closely you’ll have seen a few WiX commands passing by when executing the build file. Because we are going to handle the WiX build process in our build file we can exclude the setup project from the build configuration. Right click on the solution in the Solution Explorer in Visual Studio and choose for Configuration manager.

image

Change the active solution configuration to ‘Release’ and uncheck the build flag next to the setup project.

image

Update the Product.wxs file

Now we have all our files we have to install we have to reference to the created MyWebComponents CompenentGroup and delete the entries we made before to add the files.

Build the installer

Now that we have all the components for the first fase (installing the files) we can use the candle.exe and light.exe tools from the WiX tool belt to built our installer.

Add properties in the build file

First we need some more properties in our build file. Add the WebSiteContentObject parameter that will hold the compiled WiX code (WebSiteContent.wixobj). And also add the MsiOut parameter that will hold the path and name of the installer (.msi) file.

Add candle.exe in the build file

Add a new target tag in the build file and add the candle.exe tool with the parameters where to find the publish directory and witch files he has to compile.

Add light.exe in the build file

In the same target (WIX) add the light.exe command with parameters where to put the generated msi and witch source files to include.

Final run

Open up your Developer Command Prompt and type the next command where we added the WIX target:

msbuild /t: Build;PublishWebsite;Harvest;WIX setup.build

Hit enter and keep your fingers crossed. If you had no error messages you should find a msi file in the bin/release folder of the setup project. Run that installer and you’ll see that under the C:\inetpub folder a DemoWebsite folder is added with all the published files from our webapplication.

If you had any errors you can find the complete files here:

Next parts

Enough for one blog post I would say. the next posts in this series will handle the next actions:

  • Install the .NET 4.5 framework if that isn’t installed already
  • Install the MVC 4 framework if that isn’t installed already.
  • Create a folder and copy all needed files to run the application (done)
  • Create a new database on an existing SQL server and prefill the database with the correct tables and values. (the connection details and database name should be entered by the end user running the installer)
  • Create a new website in IIS 7.5 (create website and application pool running under .NET 4.5)
  • Alter the config file so the correct connection settings are used (entered by the end user)

Complete source code

You can find the complete source code for this project on GitHub. Keep in mind that this project will be altered when the next parts are implemented. I will try to keep the commits together with the series.

Other posts in this series

Securing Backend Pages in MVC for Umbraco 4.11.1

Beginning of the year I posted an article on how you can create backend pages in the open source ASP.NET CMS Umbraco (http://blog.bartdemeyer.be/2013/01/using-mvc-backend-pages-in-umbraco-4-11-1). At the end of the post I published a little TODO list:

  • Block access to the backend controller for non authenticated users
  • Adapt the actions that you get in the Umbraco back end by right clicking
  • Due to a very busy work schedule I didn’t had the time to look into this list. In the mean while version 6 was released by the Umbraco core team.

    Last week I received the question if I had already found a solution for the first item on the todo list: blocking access to the backend controller for non authenticated users.

    Between the search for Easter eggs together with my son, backing pancakes and nothing interesting on the TV this evening I found the time to implement the feature.

    Reminder: the problem

    A small reminder of the problem we are facing. We’ve created a MVC controller to access from the Umbraco backend to perform our own business logic like shown in the image below.

    image

    We used the implementation if the Umbraco’s Surface  Controller that will create a MVC area. If we know the structure of the URL to this area – controller – action we can access the page without logging in the Umbraco backend.

    image

    This is off course a security risk we have to solve. We don’t want non authenticated users to be able to access our business logic.

    Using the Authorization attribute

    In ASP.NET MVC access to certain controllers or individual actions is managed by using the Authorization annotation attribute. You can use the default attribute where you are able to filter request based on specific users or specific user roles.

    But you can off course inherit from the default attribute and implement your own authorization attribute.

    Create the UmbracoAuthorizeAttribute

    In this post I’ll extend the project we’ve created during the previous post and that you can find on Github.

    Add a folder ‘Helpers’ in the UmbracoMVCDemo.BackEnd project. In that folder create a new class ‘UmbracoAuthorizeAttribute’. Add the public keyword to the class implementation and we shall inherit from the System.Web.MVC.AuthorizeAttribute.

    Implementing authorization

    Implementing your own authorization login can be done by overriding two methods from the base class: AuthorizeCore(HttpContextBase httpContext) and OnAuthorization(AuthorizationContext filterContext).

    In AuthorizeCore(HttpContextBase httpContext) we will connect to the Umbraco backend to check if the user is authenticated or not.

    I’ll first check if the httpContext contains any value, if not we’ll throw an exception. After that I’ll use a method from the Umbraco BasePage: ValidateUserContextID. This method will return true if the user is authenticated and false if not. With that result we’ll set a class variable we can use in the implementation of the OnAuthorization method.

    In this implementation we’ll first execute the base class implementation before we check the failedAuthentication class variable. If the authentication in the failedAuthentication failed we’ll send the user to the login page using the FormsAuthentication class.

    Adding authorization to our controller

    It’s not enough to create the attribute, we still have to tell our controller to use the authentications we’ve implemented. Open up the DemoAdminSurfaceController class we created in the previous post and add the UmbracoAuthorize attribute (line 4).

    Testing

    I’ve opened up another browser and accessed the same action again. (keep in mind that we make use of the default FormsAuthentication that will use a session cookie. Therefor will a new tab in the same browser not give the desired effect). Because we’re not authenticated we get redirected to the login page.

    image

    You’ll see the url we entered in the ReturnUrl parameter. If we now enter our credentials we’ll get redirected to the Umbraco back end. Although the ReturnUrl is filled out we’ll not be redirected to the correct page. We still have to click on our demo Section and demo node.

    Remark

    I’ve had to alter the default web.config file to be correctly redirected to the login page. I’m not sure this needs to be done if you have a fresh installation, I’ll add it here to avoid bad redirections.

    Source

    You can find the full source code from this post and the earlier posts on Github. Feel free to download, fork, comment, …

    Roadmap for ASP.NET MVC, ASP.NET Web API, and ASP.NET Web Pages

    I saw a tweet from John Galloway (@jongalloway) coming by this evening that can interest any developer in the ASP.NET stack. It’s a draft of the features that Microsoft want to include in the next release of the stack.

    There are no release dates and they do emphasize it’s a planning document but I like the way Microsoft is going with the open sourced ASP.NET stack.

    http://aspnetwebstack.codeplex.com/wikipage?title=Roadmap

    Creating a JIRA interface in 1-2-3

    For one of our projects where close to the first test release. While preparing the necessary documents (test overview, legal documents, bug report, …) I felt a bit ashamed to give the client a Word document to report bugs to us. For a software development company it’s a bit shameful to let the client fill out a paper, scan it, mail it and then have someone copy the document in our issue tracker.

    While driving home I thought it couldn’t be that difficult to set up a small site where the client can report the bugs. But I didn’t want to create a new bug tracker nor give the client direct access to our issue tracker (JIRA from Confluence).

    JIRA has a API that you can address to create and fetch issues from their tracker. But I didn’t want to  spend a couple of hours implementing the REST service. (jeah, I know, lazy as hell)

    Nuget to the rescue

    When I got home, the first thing I checked was the nuget site to see if anyone had already created a package to communicate with the JIRA API. First thing that showed up in the search was Atlassian.SDK a complete package, even including a Linq Query implementation to search for issues created by Federico Silva Armas.

    image

    Great, let’s get started.

    New MVC 4 web application

    I fired up Visual Studio 2012 and choose a new MVC 4 Default application with Razor support. Opened up the Package Manager Console and ran the following command:

    Add controller

    I added a new controller in the controllers folder and named it HomeController. In the Index method I’ve added the call to JIRA to fetch all items from a certain filter.

    The implementation is really simple, create a new Jira object with as parameters the URL to your JIRA instance, a username and a password. (in the constructor)
    In the Index method you then can call GetIssuesFromFilter and add the filtername as parameter. The advantage of using a filter is that you can always change this filter settings if you want to remove certain issues from the result without to change anything in your application.

    You’ll need off course the user rights correctly set in JIRA to access the issues that are returned from the filter.

    Add View

    Next I created a new view under the Views – Home folder using the add view action after a right click on the folder. Create a strongly-typed view by selecting the Atlassian.Jira class as Model class.

    image

    Click Add and the view is created.

    If you hit F5 now, your browser should open up and you get already the overview screen for all issues returned from the filter you have selected.

    In 10 minutes I’ve created a working (but ugly) web application that can fetch all the tickets I wanted to show to the customer. Of course your view will need some tweaking to show the values of the issues you want to be shown.

    Adding a new issue

    Adding a new issue to JIRA is as simply. (You can check the complete code on Github). I give you a (very) short overview.

    Create 2 new methods Create in the HomeController. The first one just returned the view, the second one add the HttpPost attribute and this will receive an Atlassion.Issue object with all the values. Pushing this to JIRA is as simple to create a new issue object from the jira object and fill up the values. Hit SaveChanges on the jira object and your issue is created.

    On thing I had a problem with is the projetc name – key difference in the jira.CreateIssue() method. I first tried with the project name but I got some HTML 500 error returning. Although for fetching issues this worked fine but for creating issues you apparently have to gibe the project key instead of the project name.

    Look and feel

    Ok, we have a working application but the look and feel isn’t that, certainly not enough to send to an end user. I didn’t wanted to spend to much time on the look and feel and decided to use the Twitter Bootstrap.

    Don’t start downloading the package from the Twitter Bootstrap website. Instead use the nuget package manager again. There is a Bootstrap for MVC 4 package that will add all necessary items to your solution.

    Open up the Package Manager Console again and run the following command:

    Add bootstrap to the bundles

    To add the bootstrap files to your application we’ve to alter the style and script bundles that are in use. Open up the BundleConfig.cs class in the App_Start folder. There we can add the necessary files to the bundles.

    Online 28 I changed the the Content/css bundle to include the bootstrap css instead of the default Site.Css. On line 21 I added a script bundle to include the bootstrap.js file.

    Because I added a script bundle we’ll have to add this bundle in the _ Layout.cshtml view.

    Just underneath the rendering of the jQuery bundle add the rendering of the bootstrap bundle. (at the bottom of the view.

    Result

    I was able to create an new interface for our client to report bugs in just an hour of two. (the above only took 30 min but I’ve added some extra logic to send emails and stuff). Off course it’s not correct to add all business logic in your controllers and to hard code some strings and stuff. For this small application it’s more then enough. Underneath the screenshots of the 2 pages (in Dutch).

    image

    image

    Source code

    You can find this project on Github, feel free to fork, comment, …

    One note, to avoid adding my personal credentials to the project I’ve created an xml file that holds the credentials in the App_Data folder. When creating the Jira object I fetch the values from this file. For obvious reasons I added this file to the .gitignore so it wouldn’t be pushed to Github. The structure of the file:

    The hard search for missing Extension methods in Umbraco 4.7.0

    Implementing SignalR

    For one of our company websites we got the question from HR to implement a chatbox on the website so interested candidates could contact them in an easy way. After comparing a few open source alternatives we decided to build our own using the just released SignalR framework.

    Everything worked fine on our development server where we’re running a backup of the production Umbraco website. Our dev team could easily create the chatbox and sooner as expected we had a working chatbox to present to HR.

    Moving changes to staging

    Like all our development projects we work in different steps. Development on the local machine or development server, client tests on the staging machine. This way we remove the risk that some developers test come in the way of our clients testing.

    For this implementation the client is our own HR department, still we follow the same development guidelines to avoid test data on the acceptance (staging) environment.

    Extension methods missing

    After copying all DLL’s and usercontrols to the staging environment we noticed that all of our Macros in Razor where failing. Suddenly the ‘umbraco.MacroEngines.DynamicNodeList‘ was missing the extension methods like ‘First’ and ‘FirstOrDefault’.

    image

    Start debugging

    First reaction was of course to delete all the DLL’s we’ve altered for this last release and to reinstate the old DLL’s. Still we faced the same problem.

    Back to start, we took a new backup from the production server and started the deploy again. There we noticed we overwritten a third party DLL ‘Newtonsoft.Json.dll’, a well known library for Json conversions created by James Newton-King. More information on his website.

    We skipped the replacement of the DLL and all of our Razor scripts we’re working like before. Problem solved (we thought).

    SignalR failed to work

    After the re-deploy of our chatbox DLL’s and usercontrols we couldn’t get the chatbox to work. It seemed the SignalR hub was missing to contact the server to register a chat user. A check with Firebug reveled the hub couldn’t be loaded because a DLL reference couldn’t find the correct version of the DLL. Of course the ‘Newtonsoft.Json.dll’ was playing up again.

    image

    Some more debugging

    No problem, we find out where Umbraco references the DLL and update it to the latest version and rebuild the Umbraco DLL and we’re good to go. Wrong, we checked the source of the 4.7.0 version that was available on codeplex but no sign of ‘Newtonsoft.Json.dll’.

    Then it had to be one of our own projects referencing the DLL? No, none of our own project had a reference to the ‘Newtonsoft.Json.dll’.

    I loaded the project on disk, configured it in IIS and attached the Visual Studio debugger. In the Debug menu –> windows –> Modules component I could find the ‘Newtonsoft.Json.dll’ reference but no way to find out witch component was responsible for loading the DLL.

    Some more (manual) debugging

    As I couldn’t find a way to find out who was responsible for loading the DLL I had only one option left.

    I took a look at the download at codeplex and removed all DLL’s that were not in the original download. Of course some other problems showed up as all custom created usercontrols failed to load but the Razor Extension methods worked and I could start a tedious process of adding DLL’s to the bin folder with my Visual Studio debugger attached and to reload the site every time.

    Found the problem

    When I copied the ‘Twitterizer2.dll’ back into the bin folder the Razor scripts failed again. I finally found the source of the problem. After a quick look at the Github repository of the Twitterizer project I found the Newtonsoft references and the different versions in the packages folder.

    Resolving the problem

    I did found the problem but we wanted to keep the Twitter possibilities that we had implemented before so we needed the Twitterizer2 DLL.I forked the project on Github and cloned the project locally.

    After updating the package to the latest version (the same our SignalR implementation was using) I’ve rebuilded the DLL and copied it to the Umbraco bin folder. Finally we had our Razor scripts working and our chatbox was responding!


    It took me half a day of debugging before I did found the problem. If anyone has a good way to find out witch component loads a certain DLL, let me know in the comments or by a tweet, …

    Using MVC backend pages in Umbraco 4.11.1

    Umbraco backend

    In a previous post we saw the use of your own MVC controllers in the Umbraco front end. The Umbraco community has made effort to document these possibilities on our.umbraco.org. The use of MVC in the back end of the Umbraco interface is not very well documented and it took me some analysis and debugging of the source code to find out how this could be implemented.

    Default you have 7 sections in the backend:

    • Content
    • Media
    • Settings
    • Developer
    • Users
    • Members
    • Translation (hidden by default for the admin user)

    These sections will do in a plain website where you don’t want to use custom code.

    One of my personal projects is to create a new website for the sport club where I’m already 15 years affiliated with. The current website is already 7 or 8 years old and was written in PHP. Needless to say that the look and feel is outdated, the PHP code I’ve written 8 years ago wasn’t the most beautiful piece of code I’ve created.
    I wanted to create a new website in ASP.NET MVC but I don’t want to put the effort in creating controllers and views for the administration part where a good CMS can fill up this gap.

    Because I’m already familiar with Umbraco it looked a good choice to combine the strength of Umbraco with custom development. But therefor I had to get custom MVC controllers working in the backend.

    New backend project

    This blog post goes further on the project created in the previous post. You can download the source at Github.

    In the existing solution we’ll add a new project by right clicking the solution and choose Add – New project.

    image

    Choose for a ASP.NET MVC 3 Web Application and give it a name (in this demo: UmbracoMVCDemo.BackEnd)

    image

    In the next window choose for Internet Application and the Razor view engine. We’ll need the core Umbraco libraries so open up the Package Manager Console and type ‘”Install-Package UmbracoCms.Core” and hit enter. Wait for the “Successfully added ‘UmbracoCms.Core 4.11.1’ to UmbracoMVCDemo.BackEnd.” message and we’re ready to go.

    Adding a new section

    First we’ll have to create a new section in the Umbraco backend. Open op your windows explorer and go to the root of the Umbraco installation. Open up the config folder and open up the applications.config file.

    <?xml version="1.0" encoding="utf-8"?>
    <applications>
      <add alias="content" name="Content" icon=".traycontent" sortOrder="0" />
      <add alias="media" name="Media" icon=".traymedia" sortOrder="1" />
      <add alias="settings" name="Settings" icon=".traysettings" sortOrder="2" />
      <add alias="developer" name="Developer" icon=".traydeveloper" sortOrder="3" />
      <add alias="users" name="Users" icon=".trayusers" sortOrder="4" />
      <add alias="member" name="Members" icon=".traymember" sortOrder="5" />
      <add alias="translation" name="Translation" icon=".traytranslation" sortOrder="6" />
    </applications>


    You’ll see the existing 7 sections configured in the config file. We’ll add a new one:

      <add alias="demo" name="Demo" icon="demo.gif" sortOrder="7" />
    

    We give the new application or section the alias ‘demo’ and the name ‘Demo’. For the icon we’ll add a new picture called ‘demo.gif‘ and set the sort order to 7. (The default images are showed using sprites where the icon name is actually the css class to define the background image. You can choose to alter the existing sprite and add a css class or select new picture). Create a new picture with your favorite image editor, name it ‘demo.gif’ and place it in the folder: [Umbraco root]/umbraco/images/tray/ folder.

    We’ll have to force the application pool to restart before Umbraco loads the new section. Open up the web.config file in the umbraco installation root and add a line break, save and refresh the page.

    Still the new section is not available in the backend because none of the users have access to this new section. Go to the users section, open up your user and add a check in the sections area next to the demo section. Refresh your page and you’ll see the new section appear.

    image

    When you click the Demo section at the bottom of the page we’ll see a new section opening up with an empty tree and the section name in square brackets.

    Adding a tree

    Next step will be to create the tree for our Demo section. This tree you can populate with data you choose. For this demo we’ll use some dummy data.

    In our backed project add a folder ‘Trees’ and add a new class named DemoTree. This class will have to inhered from the umbraco.cms.presentation.Trees.BaseTree class. This class has 3 abstract methods that we’ll need to implement.

    • RenderJS: the javascript that will run when a tree node is clicked
    • Render: the creation of tree nodes
    • CreateRootNode: to define the root node.

    We’ll also have to create a constructor that will receive a string that will forward to the base class.

    Last but not least we’ll have to decorate the class with the umbraco.businesslogic.TreeArrtibute where we define the application alias and title.

    using System;
    using System.Collections.Generic;
    using System.Linq;
    using System.Text;
    using System.Web;
    using umbraco.cms.presentation.Trees;
    
    namespace UmbracoMVCDemo.BackEnd.Trees
    {
    	[Tree("demo","demo","Demo")]
        public class DemoTree : umbraco.cms.presentation.Trees.BaseTree
        {
            public DemoTree(string application) : base(application)
            {
            }
    
            public override void RenderJS(ref StringBuilder Javascript)
            {
                throw new NotImplementedException();
            }
    
            public override void Render(ref XmlTree tree)
            {
                throw new NotImplementedException();
            }
    
            protected override void CreateRootNode(ref XmlTreeNode rootNode)
            {
                throw new NotImplementedException();
            }
        }
    }
    

    Let’s start with defining the root node what is as simple as setting the NodeType and NodeId parameter.

    protected override void CreateRootNode(ref XmlTreeNode rootNode)
    {
    	rootNode.NodeType = "init" + TreeAlias;
    	rootNode.NodeID = "init";
    }
    

    Next we’ll implement the Render method and attach 2 nodes to the tree.

    public override void Render(ref XmlTree tree)
    {
    	XmlTreeNode xNode = XmlTreeNode.Create(this);
    	xNode.NodeID = "1";
    	xNode.Text = "Demo Node 1";
    	xNode.Action = "";
    	xNode.Icon = "folder.gif";
    	xNode.OpenIcon = "folder_o.gif";
    	OnBeforeNodeRender(ref tree, ref xNode, EventArgs.Empty);
    	if (xNode != null)
    	{
    		tree.Add(xNode);
    		OnAfterNodeRender(ref tree, ref xNode, EventArgs.Empty);
    	}
    
    	XmlTreeNode xNode2 = XmlTreeNode.Create(this);
    	xNode2.NodeID = "2";
    	xNode2.Text = "Demo node 2";
    	xNode2.Action = "";
    	xNode2.Icon = "folder.gif";
    	xNode2.OpenIcon = "folder_o.gif";
    	OnBeforeNodeRender(ref tree, ref xNode2, EventArgs.Empty);
    	if (xNode2 != null)
    	{
    		tree.Add(xNode2);
    		OnAfterNodeRender(ref tree, ref xNode2, EventArgs.Empty);
    	}
    }
    

    In the RenderJS method remove the ‘throw new NotImplementedException” line and build the project. We’ll have to copy the UmbracoMVCDemo.BackEnd.dll from the bin folder to the Umbraco installation bin folder.

    Refresh the page and you’ll see two new node appear. Notice that the Demo root node isn’t surrounded by square brackets any more.

    image

    If you open up the trees.config file in the umbraco root – config folder you’ll see Umbraco automatically added the tree.

    For now the nodes don’t do much if you click on it because we left the Action attribute empty. Before we can add an action we need the editor for the right hand side.

    Adding an editor – controller and views

    Like I said before we want to create the editor in a MVC pattern instead of the default Webforms like was possible before. Therefor will create a new controller by right clicking the controllers folder in the backend project.

    image

    Name the controller DemoAdminController and choose for the empty controller template. Because we’ll already have a DemoController in the frontend application I named this one DemoAdmin to avoid confusion.

    The Controller will have to inhered from the Umbraco.Web.Mvc.SurfaceController before we can use it in the backend.

    IMPORTANT: Although the documentation of version 5 stated the controller didn’t need to be suffixed by ‘Surface’ I noticed there are constraints set on the PluginControllerResolver in the Umbraco source code. We can remove this constraint in the source code but the easiest way is to rename our controller to DemoAdminSurfaceController. This will change our URL’s but they won’t be visible in the Umbraco backend anyway.

    We have to decorate the class with the Umbraco.Web.Mvc.PluginController attribute. (yes, the plugincontroller attribute although we’re inheriting a SurfaceController). In this attribute we’ll have to enter the area name. Every plugin will be placed in his own MVC area to avoid duplicate views and controllers. We’ll set the area name to ‘demo’.

    Last but not least we’ll have to create two constructors. One without parameters, one that will take a Umbraco.Web.UmbracoContext instance and forward this to the base class.

    using System;
    using System.Collections.Generic;
    using System.Linq;
    using System.Web;
    using System.Web.Mvc;
    using Umbraco.Web;
    using Umbraco.Web.Mvc;
    
    namespace UmbracoMVCDemo.BackEnd.Controllers
    {
        [PluginController("Demo")]
        public class DemoAdminSurfaceController : SurfaceController
        {
    
            public DemoAdminSurfaceController()
            {
            }
    
            public DemoAdminSurfaceController(UmbracoContext umbracoContext)
                : base(umbracoContext)
            {
            }
    
            public ActionResult Index()
            {
                return View();
            }
        }
    }


    Last but not least we’ll have to create a view to back up the Index action on our controller that will for now will be one line:

    “<h1>Backend Demo Controller – view</h1>”

    Build the backend project and copy the dll to the Umbraco installation bin folder. Default will the view be searched in the following folder:

    [Umbraco ROOT]/App_Plugins/Demo/Views/DemoAdminSurface/. That is App_Plugins/[AreaName]/Views/[ControllerName]/. Create the folders and add the index view.

    I we go to the Umbraco backend we”’ll notice the 2 demo nodes still don’t do anything if we click them. We’ll first have to assign an action to these nodes.

    Assign an action to the nodes

    To assign an action to the nodes we’ll have to do two things. We’ll have to implement the RenderJS method in out Tree class and fill out the Action parameter from our nodes in the Render method.

    In the RenderJS method will render the necessary javascript that will open our editor in the right hand pane by using the ‘UmbClientMgr’ javascript object.

    public override void RenderJS(ref StringBuilder Javascript)
    {
    	Javascript.Append(
    	@"function openDemoController() {
    		UmbClientMgr.contentFrame('/Demo/DemoAdminSurface');
    	}");
    }
    

    In the Render method will add a call to the javascript action we just created (for now only on the first node).

    public override void Render(ref XmlTree tree)
    {
    	XmlTreeNode xNode = XmlTreeNode.Create(this);
    	xNode.NodeID = "1";
    	xNode.Text = "Demo Node 1";
    	xNode.Action = "javascript:openDemoController();";
    	xNode.Icon = "folder.gif";
    	xNode.OpenIcon = "folder_o.gif";
    	OnBeforeNodeRender(ref tree, ref xNode, EventArgs.Empty);
    	if (xNode != null)
    	{
    		tree.Add(xNode);
    		OnAfterNodeRender(ref tree, ref xNode, EventArgs.Empty);
    	}
    
    	XmlTreeNode xNode2 = XmlTreeNode.Create(this);
    	xNode2.NodeID = "2";
    	xNode2.Text = "Demo node 2";
    	xNode2.Action = "";
    	xNode2.Icon = "folder.gif";
    	xNode2.OpenIcon = "folder_o.gif";
    	OnBeforeNodeRender(ref tree, ref xNode2, EventArgs.Empty);
    	if (xNode2 != null)
    	{
    		tree.Add(xNode2);
    		OnAfterNodeRender(ref tree, ref xNode2, EventArgs.Empty);
    	}
    }
    

    Build the project and copy the dll to the Umbraco installation bin folder and refresh the backend in the browser. If we now click the first test node we’ll see the test view appear in the right hand side frame.

    Automating the copy process

    Just like in the previous blog post you can use the build events to automate the copy process of DLL’s and views. Place the 2 xcopy commands in the post build event.

    xcopy $(TargetPath) $(SolutionDir)UmbracoMVCDemo\bin\ /C /Y
    xcopy $(ProjectDir)Views $(SolutionDir)UmbracoMVCDemo\App_Plugins\Demo\Views\ /E /Y

    Source code

    You can find the solution above on Github.

    To do’s

    There are still some things I need to resolve:

    • Block access to the backend controller for non authenticated users
    • Adapt the actions that you get in the Umbraco back end by right clicking
    • ….

    Using MVC frontend pages in Umbraco 4.11.1

    Umbraco CMS

    Umbraco had a rough year, is the least we can say . After working on version 5 from the bottom up for almost 2 years they decided beginning 2012 to stop the version 5 with reason. Although I understand the reasons I’m very glad I didn’t had put any effort yet in the V5.

    Umbraco is an Open Source ASP.NET Content Management System that gives the developer a lot of freedom without interfering with the generated HTML, CSS and javascript. It has a steep learning curve but when you start to find your way into it, it gives you a lot of freedom.

    At my company we used the 4.7 version to create the company websites (abc-groep.be). In that version we could only use Webforms user controls to incorporate our own business logic. As I’m a big fan of MVC this stopped me to use the CMS for personal projects. The V5 version was the big promise to use MVC in Umbraco (it was actually build on MVC). Lucky for me the Umbraco developers have taken into account that MVC is a big deal for developers and while the V5 was dead the V4 version branch was enriched with MVC.

    In this post we’ll look into how you can use your own MVC controllers and views to create front end pages in an Umbraco installation.

    Installing Umbraco in new web project

    Let’s startup Visual Studio and create a new blank web project. Give it a name (here I used UmbracoMVCDemo) and click create. You’ll see that VS only creates an empty project with just 1 file, the web.config.

    image

    image

    After creating the project we’ll add Umbraco by Nuget. Open the Package Console Manager and type “PM> Install-Package UmbracoCms” and hit enter. You’ll see the installation of a couple of dependencies passing by and you should see “Successfully added ‘UmbracoCms 4.11.1’ to UmbracoMVCDemo.”. If you hit F5 you’re browser should fire up  and show the installation page of your local Umbraco CMS.

    image

    Folow the instructions to create your database (MS SQL Server, MS SQL Express Edition, MYSQL and) Microsoft SQL CE 4 database. Choose an administrator user and choose to have no template installed. (if you want you can install these later on).

    After installation go to http://localhost:53998/umbraco/login.aspx (choose the correct port as configured in IIS Express or IIS). Log in with your just created administrator and you should see an empty website.

    image

    We then only have to specify we want to use MVC for our views. Open up the Umbraco.Settings.config file in the config folder under the root. Find and alter the next setting:

    <defaultRenderingEngine>MVC</defaultRenderingEngine>

    Adding new project

    We start by adding a new project in our solution with a right click on the solution and choose Add – New Project

    image

    Choose a new ASP.NET MVC 3 Web Application and give it a name (in this demo UmbracoMVCDemo.FrontEnd).

    image

    In the next dialog choose for an internet application with Razor as View engine. We will need to have the Umbraco core libraries that we can add with Nuget. Open up the Package manager Console and type “Install-Package UmbracoCms.Core”, hit enter and wait for the “Successfully added ‘UmbracoCms.Core 4.11.1’ to UmbracoMVCDemo.FrontEnd.” message.

    Create new controller

    Add a new controller by right clicking the controllers folder and choose for Add – New Controller. Name it DemoController and choose for the Empty controller template.

    The controller needs to inhered from the Umbraco.Web.Mvc.RenderMvcController controller instead of the default ASP.NET Controller class. Next to that we’ll have to override the default Index Action method. We need to add a view for the Index action and add some test text in the view.

    using System;
    using System.Collections.Generic;
    using System.Linq;
    using System.Web;
    using System.Web.Mvc;
    using Umbraco.Web.Models;
    
    namespace UmbracoMVCDemo.FrontEnd.Controllers
    {
        public class DemoController : Umbraco.Web.Mvc.RenderMvcController
        {
            //
            // GET: /Demo/
    
            public override ActionResult Index(RenderModel model)
            {
                //Do some stuff here, then return the base method
                return base.Index(model);
            }
    
        }
    }
    
    
    @{
        ViewBag.Title = "Index";
    }</pre>
    <h2>Index</h2>
    <pre>
    This is our own Demo controller and View.
    

    And that’s it, we’re ready to build. After building our Frontend project we’ll have to copy the generated UmbracoMVCDemo.FrontEnd.dll from the bin folder to the bin folder of our Umbraco installation. Next to the DLL we have to copy the Index.cshtml view from the views/Demo directory to the Umbraco installation views subfolder.

    Configuring Umbraco for our DemoController

    Umbraco uses a technique called ‘Hijacking routes’ to allow custom controllers. Basically will Umbraco for every Document Type check if he can find a controller that inhered the MVCRenderController and has the same name as the document type. If they can find a controller they will execute the overridden Index Action.

    Open up your Umbraco interface in a browser window and click on settings. Right click on Document Types and choose Create. Type Demo and uncheck “Create matching template”. That’s all configuration that has to be done.

    Go to the content section and right click on Content and choose Create. Select the Demo document type and name it Demo. After the entry is created click on the ‘save and publish’ button on top of the entry. Open up a  new browser tab and go to http://localhost:53998/Demo (change the port to the port in your IIS or IIS Express settings) and you’ll see our test text appearing.

    image

    Using own models, …

    At our.umbraco.org you’ll can find a lot of information on how to use your own custom models, bypass the Umbraco pipeline with your own routes, use templates to access different actions, ….

    Automate the copy process

    The copy action of the dll and your views can get a bit tedious after some time (in my case after the first time) but you can use after build events to automate this process. Open up the properties of the FrontEnd project and select the Buils events tab.

    In the Post-build event command line add:

    xcopy $(TargetPath) $(SolutionDir)UmbracoMVCDemo\bin\ /C /Y
    xcopy $(ProjectDir)Views  $(SolutionDir)UmbracoMVCDemo\Views\ /E /Y
    

    The views location

    We saw before that we had to copy the Index.cshtml view from our Frontend project to our Umbraco installation root – Views subfolder. Especially if you want to use multiple actions in a controller the Umbraco Views folder gets messy. I’m more a fan of a folder per controller with in there the views for that controller.

    That’s possible but there is a catch. The Umbraco engine checks if the view is present in the Views folder before allowing the request to use your controller. If the view is missing an empty page is returned. But if we add a Demo folder and add our index.cshtml view in there we’ll see that that view will be used before the view in the root views folder. (This seems to be intended and default ASP.NET MVC behavior)

    Therefor we only need a placeholder view in the basic views folder. This can be an empty view or just add a text that refers to the correct folder. And we can then create a Demo subfolder and add the correct views in that Demo folder.

    The post build action will also copy the views to the correct subfolder instead of the root views folder.

    Second part to be careful with is when creating multiple controllers there will be multiple Index.cshtml views what will give problems in the root views folder. I can strongly recommend creating a second action with an unique name so you can use templates with a unique name for every controller.

    Source

    You can find the demo project at Github.

    Next…

    In a next blog post we’ll look into using our own MVC controllers to create backend functionality.

    Synchronizing recipients with MailChimp lists part II

    In the last post (Synchronizing recipients with MailChimp lists) we’ve seen how we can fetch the mists that are configured in MailChimp. In this part we’ll add subscribers to the mist and get the chance to unsubscribe users from the same list.

    Adding a contact class

    If we want to add contacts to our list we’ll need to create new views and alter the home controller in our demo project. In our model folder we’ll add a new class, Contact.

    using System;
    using System.ComponentModel.DataAnnotations;
    using DataAnnotationsExtensions;
    
    namespace MailChimpAPIDemo.Models
    {
        public class Contact
        {
            [Required]
            public string FirstName { get; set; }
            [Required]
            public string LastName { get; set; }
            [Required]
            [Email]
            public string EmailAddress { get; set; }
            public DateTime? BirthDate { get; set; }
        }
    }
    

    You can see I’ve added 4 parameters, first name, last name, email address and birthdate. I’ve added the ‘Required’ annotation to the 3 required parameters. For the email address I’ve added the ‘Email’ annotation. This attribute is not in the default Annotations class but can be quickly added by adding the ‘DataAnnotationsExtensions’ package from Nuget. Open the Nuget Manager Console and type the following command.

    PM> install-package DataAnnotationsExtensions
    

    New lists in MailChimp have default only one required attribute and that’s the email address. You can alter the attributes you want to make required r you can add your own attributes by the web interface. Open up the list you want to alter and choose for ‘Settings – List Field and *|MERGE|* tags’

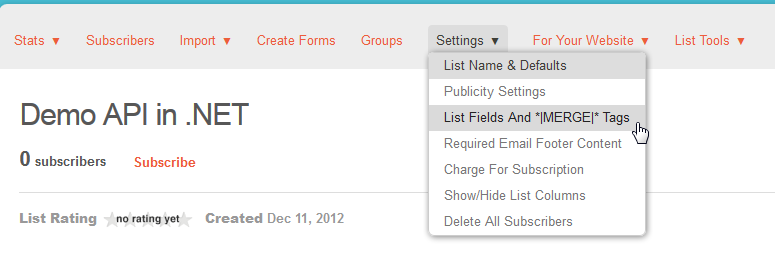
    Then you can alter the field as you like. I’ve added the Birthday field and made the first and last name required for our demo list.

    Adding the action and creating the view

    Now that we have our Contact class we can add an Action in our controller. We add the ‘AddContact’ action twice. Once to deliver the view and one to retrieve the POST information.

    using System.Collections.Generic;
    using System.Linq;
    using System.Web.Mvc;
    using PerceptiveMCAPI;
    
    namespace MailChimpAPIDemo.Controllers
    {
        public class HomeController : Controller
        {
            public ActionResult Index()
            {
                ViewBag.Message = "Modify this template to jump-start your ASP.NET MVC application.";
    
                var returnValue = new List();
    
                var lists = new PerceptiveMCAPI.Methods.lists();
                var input = new PerceptiveMCAPI.Types.listsInput();
    
                PerceptiveMCAPI.Types.listsOutput output = lists.Execute(input);
                if (output != null && output.result.Any())
                {
                    foreach (var listsResult in output.result)
                    {
                        returnValue.Add(new McList()
                            {
                                ListId = listsResult.id,
                                ListName = listsResult.name,
                                MemberCount = listsResult.member_count,
                                UnsubscribeCount = listsResult.unsubscribe_count
                            });
                    }
                }
    
                return View(returnValue);
            }
    
            public ActionResult AddContact(string listId)
            {
                return View();
            }
    
            [HttpPost]
            public ActionResult AddContact(string listId, Models.Contact contact)
            {
                return RedirectToAction("Index");
            }
        }
    
        public class McList
        {
            public string ListId { get; set; }
            public string ListName { get; set; }
            public int MemberCount { get; set; }
            public int UnsubscribeCount { get; set; }
        }
    }
    

    In the second action we will add the code to add the contact to the MailChimp list. First we’ll have to add the view to enter the contact’s details. Right click on the first ‘AddContact’ method and choose for ‘Add View’. (Don’t forget to build the application first so the new Contact class can be found)

    Click ‘Add’ and you’ll see a new view get generated in the ‘Views\Home’ directory. We’ll still have to create a link in the ‘Index’ view to go to the new created ‘AddContact’ view. Because we need the list id we’ll add the link in the table where all lists are listed.

    @model IEnumerable
    @{
        ViewBag.Title = "Home Page";
    }</pre>
    <h3 style="text-align: justify;">MailChimpLists</h3>
    <p style="text-align: justify;">
    @foreach (var result in Model) { }</p>
    
    <table>
    <thead>
    <tr>
    <th>List Id</th>
    <th>List name</th>
    <th>Subscribers</th>
    <th>Unsubscribers</th>
    <th></th>
    </tr>
    </thead>
    <tbody>
    <tr>
    <td>@result.ListId</td>
    <td>@result.ListName</td>
    <td>@result.MemberCount</td>
    <td>@result.UnsubscribeCount</td>
    <td>@Html.ActionLink("Add contact","AddContact", new{listId = @result.ListId})</td>
    </tr>
    </tbody>
    </table>
    <pre>

    You’ll see the new table cell with the Html helper creating a link to the ‘AddContact’ action.

    Implementing the POST action

    Now we have a working view to add contacts we can implement the wrapper class in the POST action in the ‘HomeController’. In the previous blog post I’ve wrote down the workflow that is used for every API call.

    The same workflow is used for every API call:

    • Create the correct main object from the Methods namespace
    • Create the correct input type object from the Types namespace
    • Call Execute on the main object
    • Catch the result in the correct output type object from the Types namespace

    We start with creating a PerceptiveMCAPI.Methods.listSubscribe object and we’ll create a PerceptiveMCAPI.Types.listSubscribeInput object that this time will contain a few parameters. Every input class has a sub class ‘parms’ where the necessary parameters can be entered. Here we will add the email address of the contact that MailChimp will use as a primary key and the id of the list where we want to add the contact to.

    [HttpPost]
    public ActionResult AddContact(string listId, Models.Contact contact)
    {
    	var subscribe = new PerceptiveMCAPI.Methods.listSubscribe();
    	var input = new PerceptiveMCAPI.Types.listSubscribeInput()
    	{
    		parms = new PerceptiveMCAPI.Types.listSubscribeParms()
    		{
    			email_address = contact.EmailAddress,
    			double_optin = false,
    			replace_interests = false,
    			send_welcome = false,
    			update_existing = true,
    			merge_vars = new Dictionary<string, object>(),
    			id = listId
    		}
    	};
    	return RedirectToAction("Index");
    }
    }
    

    Of course we want to add the other values of the contact like first and last name. In the PerceptiveMCAPI.Types.listSubscribeParms class we already implemented the ‘merge_vars Dictionary’. In this dictionary we can add the other values.

    	[HttpPost]
    	public ActionResult AddContact(string listId, Models.Contact contact)
    	{
    		var subscribe = new PerceptiveMCAPI.Methods.listSubscribe();
    		var input = new PerceptiveMCAPI.Types.listSubscribeInput()
    		{
    			parms = new PerceptiveMCAPI.Types.listSubscribeParms()
    			{
    				email_address = contact.EmailAddress,
    				double_optin = false,
    				replace_interests = false,
    				send_welcome = false,
    				update_existing = true,
    				merge_vars = new Dictionary<string, object>(),
    				id = listId
    			}
    		};
    		input.parms.merge_vars.Add("FNAME", contact.FirstName);
    		input.parms.merge_vars.Add("LNAME", contact.LastName);
    		input.parms.merge_vars.Add("BIRTHDAY", contact.BirthDate);
    
    		return RedirectToAction("Index");
    	}
    }
    

    After we added all parameters we can invoke the ‘Execute’ method and catch the result in the output class. This class will only contain a bool value (result) if the API call succeeded or not. If it didn’t succeeded we can check the ‘api_ErrorMessages’ parameter of the output object. After the contact is added we’ll send the user back to the lists overview page.

    Testing time

    Time to test if our code is working. First of all we’ll run the application and go to the AddContact view by browsing first to the Index view.

    After we click create will be redirected to our Index page where we’ll see the list now contains 1 member.

    If we check in the MailChimp interface we’ll see the contact we’ve added by the API call.

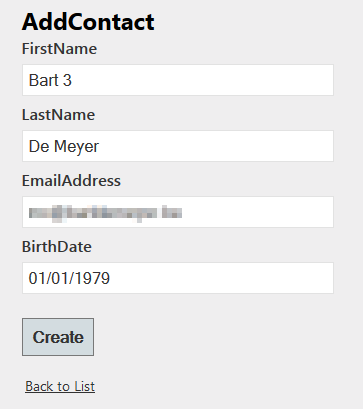
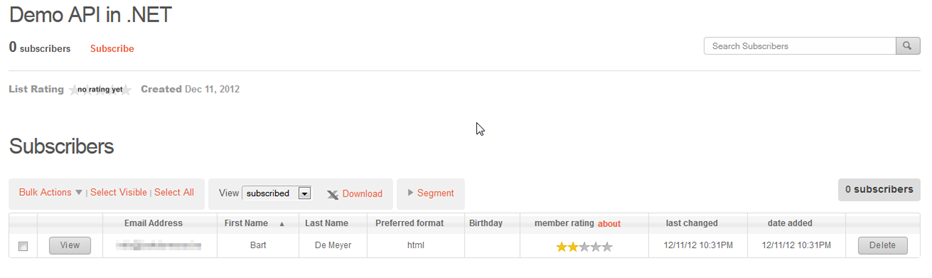
    One problem that we see here is that the Birthday is not filled out in this overview. First mistake I’ve made is to add the merge parameter without testing if the nullable DateTime has a value. If we check the API documentation we’ll see that we have to send a date value as ‘YYYY-MM-DD’ and not the European format we’ve used.

    input.parms.merge_vars.Add("BIRTHDATE", contact.BirthDate.HasValue ? contact.BirthDate.Value.ToString("yyyy-MM-dd") : string.Empty);
    

    Let’s try again:

    And let’s check the MailChimp interface again.

    And now we’ll see the correct birthdate.

    Source code

    You can find all demo’s from this blog post on Github. You’re free to fork or download.