Category Archives: jQuery

Creating a JIRA interface in 1-2-3

For one of our projects where close to the first test release. While preparing the necessary documents (test overview, legal documents, bug report, …) I felt a bit ashamed to give the client a Word document to report bugs to us. For a software development company it’s a bit shameful to let the client fill out a paper, scan it, mail it and then have someone copy the document in our issue tracker.

While driving home I thought it couldn’t be that difficult to set up a small site where the client can report the bugs. But I didn’t want to create a new bug tracker nor give the client direct access to our issue tracker (JIRA from Confluence).

JIRA has a API that you can address to create and fetch issues from their tracker. But I didn’t want to  spend a couple of hours implementing the REST service. (jeah, I know, lazy as hell)

Nuget to the rescue

When I got home, the first thing I checked was the nuget site to see if anyone had already created a package to communicate with the JIRA API. First thing that showed up in the search was Atlassian.SDK a complete package, even including a Linq Query implementation to search for issues created by Federico Silva Armas.

image

Great, let’s get started.

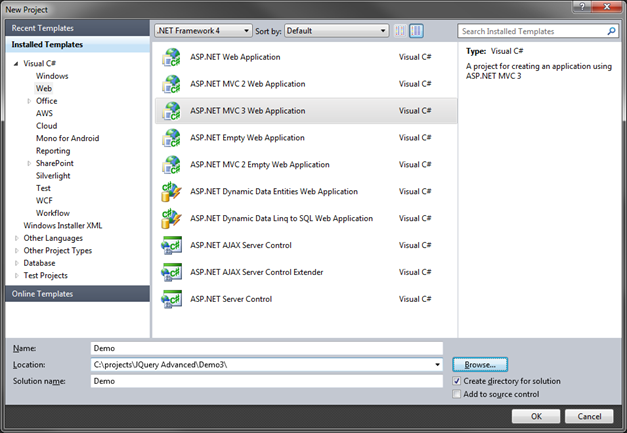
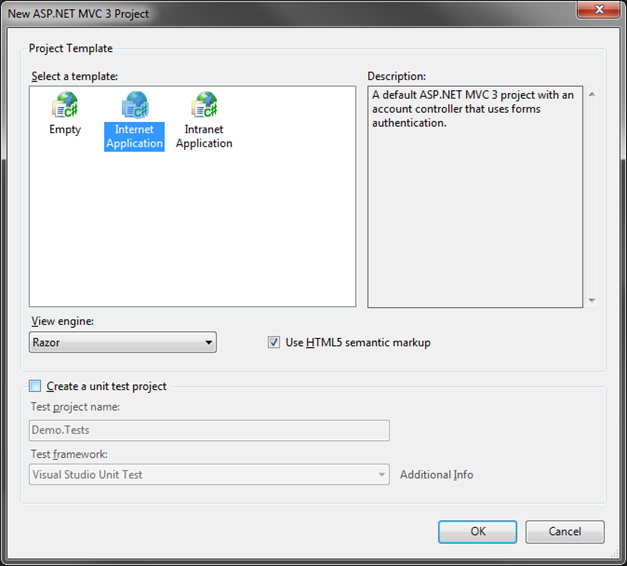
New MVC 4 web application

I fired up Visual Studio 2012 and choose a new MVC 4 Default application with Razor support. Opened up the Package Manager Console and ran the following command:
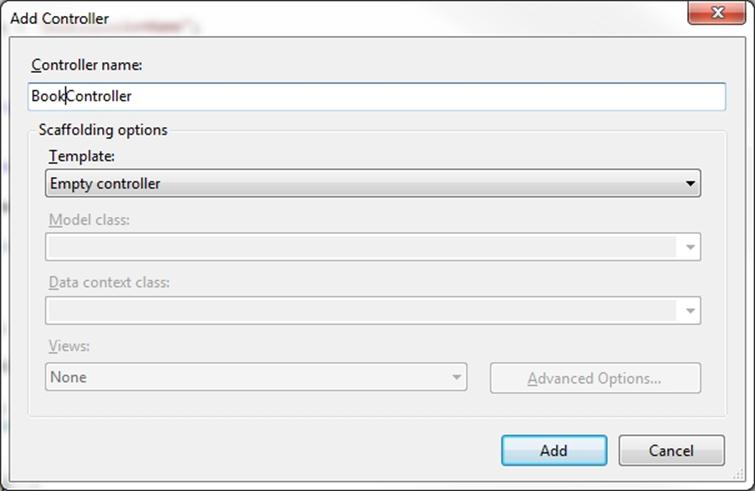
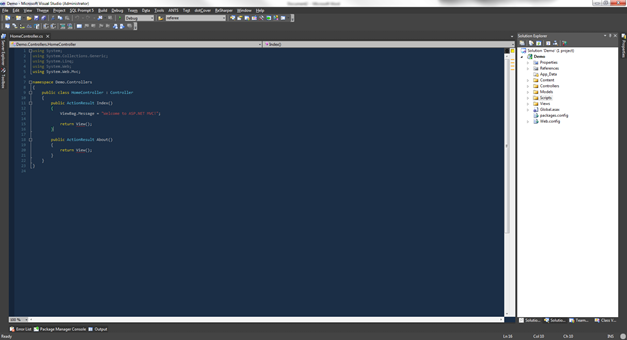
Add controller

I added a new controller in the controllers folder and named it HomeController. In the Index method I’ve added the call to JIRA to fetch all items from a certain filter.

The implementation is really simple, create a new Jira object with as parameters the URL to your JIRA instance, a username and a password. (in the constructor)
In the Index method you then can call GetIssuesFromFilter and add the filtername as parameter. The advantage of using a filter is that you can always change this filter settings if you want to remove certain issues from the result without to change anything in your application.

You’ll need off course the user rights correctly set in JIRA to access the issues that are returned from the filter.

Add View

Next I created a new view under the Views – Home folder using the add view action after a right click on the folder. Create a strongly-typed view by selecting the Atlassian.Jira class as Model class.

image

Click Add and the view is created.

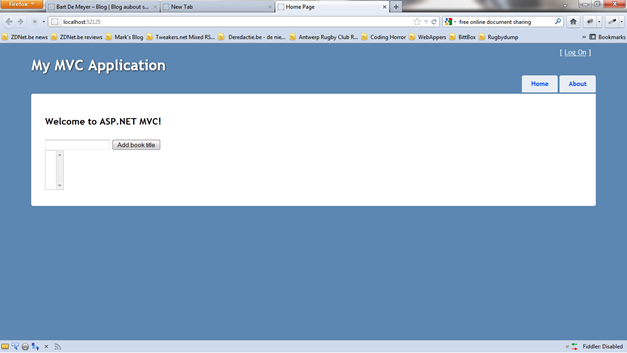
If you hit F5 now, your browser should open up and you get already the overview screen for all issues returned from the filter you have selected.

In 10 minutes I’ve created a working (but ugly) web application that can fetch all the tickets I wanted to show to the customer. Of course your view will need some tweaking to show the values of the issues you want to be shown.
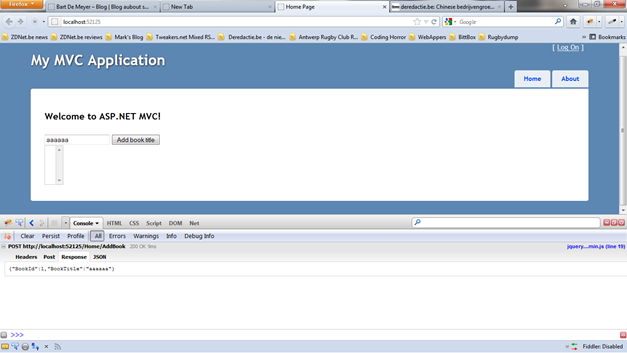
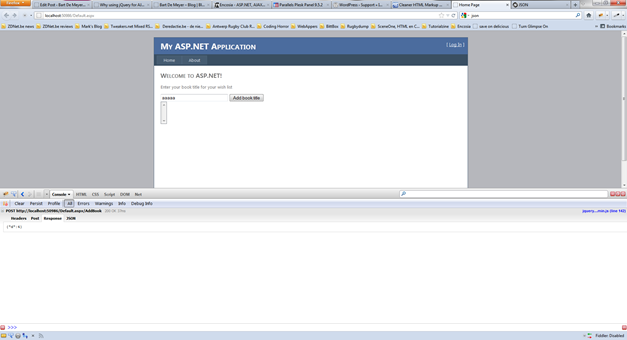
Adding a new issue

Adding a new issue to JIRA is as simply. (You can check the complete code on Github). I give you a (very) short overview.

Create 2 new methods Create in the HomeController. The first one just returned the view, the second one add the HttpPost attribute and this will receive an Atlassion.Issue object with all the values. Pushing this to JIRA is as simple to create a new issue object from the jira object and fill up the values. Hit SaveChanges on the jira object and your issue is created.

On thing I had a problem with is the projetc name – key difference in the jira.CreateIssue() method. I first tried with the project name but I got some HTML 500 error returning. Although for fetching issues this worked fine but for creating issues you apparently have to gibe the project key instead of the project name.

Look and feel

Ok, we have a working application but the look and feel isn’t that, certainly not enough to send to an end user. I didn’t wanted to spend to much time on the look and feel and decided to use the Twitter Bootstrap.

Don’t start downloading the package from the Twitter Bootstrap website. Instead use the nuget package manager again. There is a Bootstrap for MVC 4 package that will add all necessary items to your solution.

Open up the Package Manager Console again and run the following command:

Add bootstrap to the bundles

To add the bootstrap files to your application we’ve to alter the style and script bundles that are in use. Open up the BundleConfig.cs class in the App_Start folder. There we can add the necessary files to the bundles.

Online 28 I changed the the Content/css bundle to include the bootstrap css instead of the default Site.Css. On line 21 I added a script bundle to include the bootstrap.js file.

Because I added a script bundle we’ll have to add this bundle in the _ Layout.cshtml view.

Just underneath the rendering of the jQuery bundle add the rendering of the bootstrap bundle. (at the bottom of the view.
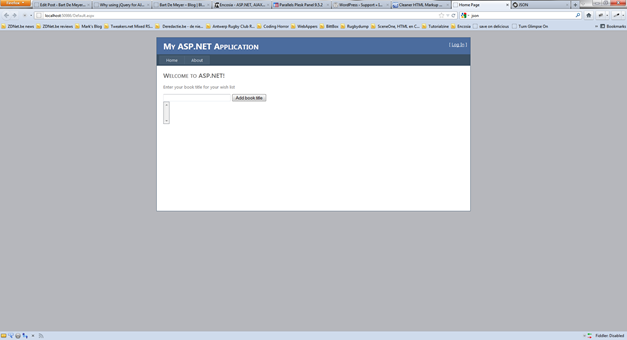
Result

I was able to create an new interface for our client to report bugs in just an hour of two. (the above only took 30 min but I’ve added some extra logic to send emails and stuff). Off course it’s not correct to add all business logic in your controllers and to hard code some strings and stuff. For this small application it’s more then enough. Underneath the screenshots of the 2 pages (in Dutch).

image

image

Source code

You can find this project on Github, feel free to fork, comment, …

One note, to avoid adding my personal credentials to the project I’ve created an xml file that holds the credentials in the App_Data folder. When creating the Jira object I fetch the values from this file. For obvious reasons I added this file to the .gitignore so it wouldn’t be pushed to Github. The structure of the file:

The birth of ABC G.OD – Group of Open Development

While working at the ABC-Groep, just north of Antwerp I’m involved in the coaching program the company have set up a couple of years ago.

As most of my colleagues are consultants working in the branch office of our customers we started with a program to provide a better follow up of the consultant, improve communication between the consultant and the company and to create a company feeling. Most of the consultants only meet each other on the obligated company meetings where for them a bunch of unknown people are present. With regular visits to the consultant, dedicated technical sessions for each branch and a fun event we try to involve the consultants in the social binding that exists in our company.

During one of my coach visits a consultant came up with the idea to create open source projects after the working hours. These projects could help us to play around in the latest version of the .NET framework and to discover the huge amount of open source libraries that can be plugged in into your .NET project. With Nuget it’s never been easier to use third party components or frameworks. As some of my colleagues work at legacy projects and others still work in .NET 3.5, doing a project in the latest version would be very interesting.

After some preparation we had our first kick-off meeting last week. With an 11 colleagues we started the ‘Open Development Group’. We talked about what should be the target, how we are to involve each other in the development process and what we we’re going to create. After some (healthy) discussion we came up with our first project: ‘The ABC Athletes Follow up’. An administrative application for coaches/trainers to efficiently follow up on their athletes.

Github

With 1 developers it’s necessary to have a common code repository to share and commit the code to. Next to the code repository we needed an issue tracker to file the open tasks and report the bugs. Since the projects would be open source we found Github is the perfect place to manage our projects. Github has a built-in issue tracker, repository browser, Wiki, …

Making the projects open source will not only improve the feedback on the created projects but will also give the contributors a very visual overview of their work in the latest version of .NET and other frameworks, components, … This overview can be very handy for the future job interviews of the contributors.

You can find our project page on http://abc-god.github.com/

GOD

The term ‘Open Development Group’ was just a work title for me to check out if there were any colleagues interested in the project. During our kick-off meeting the question arises if ‘Open Development group’ would be a good name to communicate to colleagues and the outside world. It didn’t take long to have one shouting out that if we changed it to ‘Group of Open Development’ the acronym ‘ABC G.OD’ does sound a bit better. A new name was born.

You can follow the ABC G.OD on the Github page, directly the Github repository or on twitter (@GodAbcGroep)
You’ll find more information about the ABC-Groep on the website, on twitter (@abcgroep). All .NET developers are part of the ACE branch of the ABC-groep, a company focusing on .Net development, consultancy for Microsoft Dynamics and services for the Microsoft Sharepoint platform.

Using jQuery in ASP.NET applications – part 3 MVC – creating an API

This post will extend the previous post Using jQuery in ASP.NET applications – part 3 MVC.

In the previous post we saw how to create a AJAX call to a specific controller in a MVC application. This will work just fine if you have a small amount of AJAX calls in your application. As your application Is growing you’ll notice that the AJAX calls will get stuck between the other controller actions whom return normal views.

If you want to share functionality between views you’re have repeat the same code in multiple controllers or point non-related views to your controller. This will technically work but conflicts with the MVC pattern.

MVC has a functionality to split up your code in different areas what most of the time is used to split up the administration pages from the rest of your website. Or to reorganize your code to split different use cases. We’ll use this Area functionality to create or own API.

Creating the Area

Note: I’ve switched to Visual studio 11 Beta for the demos. You’ll see the new slick black/white/grey look and feel of VS 1 in the screenshots. Neither less you can do everything underneath in Visual Studio 2010.

Open up the project we created In the previous post. Right click the project and choose ‘Add’. Select the Area option.

Give the new area the name ‘API’. After clicking Add you’ll see that visual studio create an Areas folder within their you’re ‘API’ area. In this area you’ll see the same setup as in a MVC application. You’ll have folders for controllers, models and views.

The APIAreaRegistration class visual studio created will register the routes we need to address our area.

using System.Web.Mvc;

namespace Demo.Areas.API
{
    public class APIAreaRegistration : AreaRegistration
    {
        public override string AreaName
        {
            get
            {
                return "API";
            }
        }

        public override void RegisterArea(AreaRegistrationContext context)
        {
            context.MapRoute(
                "API_default",
                "API/{controller}/{action}/{id}",
                new { action = "Index", id = UrlParameter.Optional }
            );
        }
    }
}

In the Application_Start method in the Global.asax file we’ll see the AreaRegistration.RegisterAllAreas method that will take care of the registration of the routes of the different areas when available.

        protected void Application_Start()
        {
            AreaRegistration.RegisterAllAreas();

            RegisterGlobalFilters(GlobalFilters.Filters);
            RegisterRoutes(RouteTable.Routes);
        }

Create a new controller

All our AJAX calls are related to handle books, more specific: add book titles. Therefor it is logical to create a book controller in our API. Ricght click on the controllers folder in our API area and choose for Add controller. Name it BookController and choose for an Empty controller.

Visual studio will now create the new controller. When created it should contain only an index action.

using System;
using System.Collections.Generic;
using System.Linq;
using System.Web;
using System.Web.Mvc;

namespace Demo.Areas.API.Controllers
{
    public class BookController : Controller
    {
        //
        // GET: /API/Book/

        public ActionResult Index()
        {
            return View();
        }
    }
}

We add the same code we used in our HomeController.

using System.Collections.Generic;
using System.Linq;
using System.Web.Mvc;
using Demo.Models;

namespace Areas.API.Controllers
{
    public class BookController : Controller
    {
        private static string sessionName = "BooksSessionName";

        public ActionResult AddBook(string bookTitle)
        {
            List<Book> books;
            if (Session[sessionName] != null)
            {
                books = Session[sessionName] as List<Book>;
                if (books == null)
                    books = new List<Book>();
            }
            else
            {
                books = new List<Book>();
            }
            Book book = new Book() { BookId = GetNextBookTitleId(), BookTitle = bookTitle };
            books.Add(book);
            Session[sessionName] = books;
            return Json(book, JsonRequestBehavior.AllowGet);
        }

        private long GetNextBookTitleId()
        {
            if (Session[sessionName] != null)
            {
                List<Book> books = Session[sessionName] as List<Book>;
                if (books != null)
                {
                    long ticket = books.Max(t => t.BookId);
                    ticket++;
                    return ticket;
                }
            }
            return 1;
        }
    }
}

AJAX call to the API

After rebuilding our application we can now alter our javascript call so we address the API instead of our home controller. Open up the Home.js file in our scripts folder under the root of the application. Change the URL in the AJAX call to “/API/Book/AddBook”

$(document).ready(function () {
    $("#btnAddBookTitle").click(function () {
        var $bookTitle = $("#txtBookTitle").val();
        $.ajax({
            type: "GET",
            url: "/API/Book/AddBook/",
            data: {bookTitle:$bookTitle},
            contentType: "application/json; charset=utf-8",
            dataType: "json",
            success: function (msg) {
                var $book = msg;
                var $option = new Option($book.BookTitle, $book.BookId);
                $("#lstBookTitles").append($option);
            },
            error: function () {
                alert('Error calling AddBook');
            }
        });
        return false;
    });
});

API is ready for use

With these small changes and build in functionality in visual studio we can easily create an API for all our AJAX calls. If we, for example, need to query for users by an AJAX call we can create a new user controller in our API area and implement the necessary actions.

None of the methods that solely serve AJAX calls are in the other controllers that serve views. We created a nice separation between those.

Next on the blog todo list is the implementation of an AJAX call to a WCF REST service.

You can download the demo project here

Tech session jQuery and ASP.NET

This month we organized a bunch of jQuery Tech sessions for our colleagues at the ABC-Groep where we are working for the company Ace, the Microsoft .NET company of the group. After some introduction to jQuery sessions we had yesterday the jQuery and ASP.NET, how to AJAX session. A few of the subjects that we handled are already on this blog.

The rest of the subjects will follow soon.

Until then here are the presentation and the demos of the jQuery and ASP.NET, how to AJAX session.

[UPDATE] All the source code used in the demo are placed on GitHub:

  • Presentation
  • Demo AJAX vs JQuery
  • Demo ASMX – Web Forms
  • Demo MVC
  • Demo WCF
  • Demo WEB API (including using jQuery Templates plugin and the jQueryUI autocomplete dropdown)

Keep in mind that the demos where focused on the technical implementation of AJAX calls to the different ASP.NET stacks. Therefor there has been no time spend on layout and presentation in the demos.

Using jQuery in ASP.NET applications – part 2 MVC

This is the second post in the “Using jQuery in ASP.NET applications” series where we tackle the how you can access your code base with a jQuery ajax call.

Setting up the project

Open up Visual Studio and create a new ASP.NET MVC 3 Web Application

Enter a name and a location and click the OK button. Visual Studio will now ask you if you want to create an empty, an intranet or an Internet application. Let’s choose the last one. For the view engine choose Razor. We don’t need any unit tests in this demo so leave the “create a unit test project” unchecked and click the OK button.

Visual Studio will now create a standard MVC web project where jQuery and Modernizer are included. When our project is created it will look like this:

We will reuse the simple demo application we created in the previous blog post that will let a user add his favorite book title to his wish list.

Alter the default view

Like in the Web Forms application we’ll alter the default view Visual Studio created for us. Open up the solution explorer and go to the Home folder in the Views folder. Double click Index.cshtml file. Remove the default message and add a textbox, a button and a listbox so our view looks like:

@{
    ViewBag.Title = "Home Page";
}

<h2>@ViewBag.Message</h2>
<input name="BookTitle" id="txtBookTitle" />
<input type="button" id="btnAddBookTitle" value="Add book title"><br/>
<select id="lstBookTitles" name="lsstBookTitles" size="4"></select>

Hit run (F5) in Visual Studio and our fabulous designed application will open up in a browser. As mentioned before, the focus is this post is the implementation of the ajax call, not the design of the application.

Add our business object

In our application we’re going to use a class to exchange data from the server to the client in the ajax call. Open up the solution explorer and right click on the Models folder and choose Add => Class. Name the class Book and add the following properties so our class looks like this:

using System;
using System.Collections.Generic;
using System.Linq;
using System.Web;

namespace Demo.Models
{
    public class Book
    {
        public long BookId { get; set; }
        public string BookTitle { get; set; }
    }
}

Reference and create javascript files

Unlike in Web Forms, a MVC application has default a reference to the jQuery javascript file. In solution explorer open up the Shared folder in the Views folder. There you’ll find a _Layout.cshtml class. This class is more or less the MasterPage for a MVC application. In the head tag you’ll already find a reference to the jQuery-$version$.min.js file. We don’t want to include our custom javascript in the view as it then will be loaded in every screen of our application. This is first unnecessary and secondly will slow down the page as he has to load multiple sources from the server. In MVC you can create a section in the master view. In your “child” view you can refer to that section to add custom scripts our styles into the page. Add the @RenderSection helper in the head block of the _Layout.cshtml view as shown below.

<!DOCTYPE html>
<html>
<head>
    <meta charset="utf-8" />
    <title>@ViewBag.Title</title>
    <link href="@Url.Content("~/Content/Site.css")" rel="stylesheet" type="text/css" />
    <script src="@Url.Content("~/Scripts/jquery-1.5.1.min.js")" type="text/javascript"></script>
    <script src="@Url.Content("~/Scripts/modernizr-1.7.min.js")" type="text/javascript"></script>
    @RenderSection("JavaScript", required: false)
</head>
<body>
.....

Create our custom javascript file

In solution explorer right click on the Scripts folder and choose Add => New Item. In the window that will appear select Jscript file, name it Home.js and click the Add button.

Reference our custom javascript file in our view

We still have to create a reference to our custom created Home.js file in our view. Open up the index.cshtml again and add the section tag at the top of the view. In that section add a reference to the Home.js file.

@section JavaScript
{
    <script src="../../Scripts/Home.js" type="text/javascript"></script>
}
@{
    ViewBag.Title = "Home Page";
}

<h2>@ViewBag.Message</h2>
<input name="BookTitle" id="txtBookTitle" />
<input type="button" id="btnAddBookTitle" value="Add book title"><br/>
<select id="lstBookTitles" name="lsstBookTitles" size="4"></select>

Hit Run (F5) again in Visual Studio and our page should still look the same.

Create the Ajax Method in the controller

In MVC adding a ajax method is as simple as adding an action in our controller. Instead of returning a View we’ll return a JsonResult that will convert our .NET book class to a Json representation.

private static string sessionName = "BooksSessionName";

public ActionResult AddBook(string bookTitle)
{
	List<Book> books;
	if (Session[sessionName] != null)
	{
		books = Session[sessionName] as List<Book>;
		if (books == null)
			books = new List<Book>();
	}
	else
	{
		books = new List<Book>();
	}
	Book book = new Book() { BookId = GetNextBookTitleId(), BookTitle = bookTitle };
	books.Add(book);
	Session[sessionName] = books;
	return Json(book,JsonRequestBehavior.AllowGet);
}

private long GetNextBookTitleId()
{
	if (Session[sessionName] != null)
	{
		List<Book> books = Session[sessionName] as List<Book>;
		if (books != null)
		{
			long ticket = books.Max(t => t.BookId);
			ticket++;
			return ticket;
		}
	}
	return 1;
}

I’ve added a static string to hold the session name and a private helper method to generate an id for the added book based on the list in the session. In the return statement we create the Json object we want to send to the client. Don’t forget the JsonRequestBehavior.AllowGet flag to allow GET requests to this method!

Create the Ajax call in jQuery

Now our code behind method is available we only deed to call this method from the client. When the button is clicked we’ll call the method and add the returned object to our list. Let’s start with creating an event handler for the click event on the button. Open up the Home.js file we created and add the following lines:

$(document).ready(function () {
    $("#btnAddBookTitle").click(function () {
        alert('Button is clicked !!');
        return false;
    });
});

If we now run our application (hit Run in VS or F5) and we press the ‘Add book tile ‘ button well see a javascript popup telling we’ve clicked the button. Now we can add the ajax implementation.

$(document).ready(function () {
    $("#btnAddBookTitle").click(function () {
        var $bookTitle = $("#txtBookTitle").val();
        $.ajax({
            type: "GET",
            url: "/Home/AddBook/",
            data: {bookTitle:$bookTitle},
            contentType: "application/json; charset=utf-8",
            dataType: "json",
            success: function (msg) {
            },
            error: function () {
                alert('Error calling AddBook');
            }
        });
        return false;
    });
});

I’ve added a variable $bookTitle that holds the value the user has entered in the text box. After that line we’ll start the ajax call. I’ve added some settings in that call:

  • Type: can be POST or GET, in this case: GET
  • url: The url where the values should be posted to: the controller name + action name
  • The data: we have to send the booktitle to our code behind method. This we will rap in a JSON format (more info on http://www.json.org)
  • ContentType: We declare we want to use JSON to communicate with the server
  • Datatype: We declare we want to use JSON to receive data from the server
  • Success: what we have to do when the call is succeeded (not filled out yet)
  • Error: what we have to do when the call throws an error.(alerting a message box in this case)

If we run the application and open up a Firebug screen (in Internet explorer you can use the Developer Tools as you can use these in the Chrome browser). After clicking the button we see a async request to the server that returns an JSON object representing our book.

Implement success function

All we now have to do is to implement the success function so our returned book is added to the list of book titles.

$(document).ready(function () {
    $("#btnAddBookTitle").click(function () {
        var $bookTitle = $("#txtBookTitle").val();
        $.ajax({
            type: "GET",
            url: "/Home/AddBook/",
            data: {bookTitle:$bookTitle},
            contentType: "application/json; charset=utf-8",
            dataType: "json",
            success: function (msg) {
                var $book = msg;
                var $option = new Option($book.BookTitle, $book.BookId);
                $("#lstBookTitles").append($option);
            },
            error: function () {
                alert('Error calling AddBook');
            }
        });
        return false;
    });
});

As we’re receiving an javascript object (JSON) we can create the option using the parameters of the object.

If your un the application now you’ll see the book titles are added to the list, all with their id. From here you can implement delete, edit and other functions.

Next post will be how we can refactor the above so we create an API that’s not tied to a specific controller.


Using jQuery in ASP.NET applications – part 1 Web Forms

After the previous post (Why using jQuery for AJAX calls before the Ajax Control Toolkit)we going to see in this post how you can set up a Web Forms project and how you can easily can create Ajax calls to your code behind.

Setting up the project

Open Visual Studio and create a new ASP.NET Web Application.

Enter a name and a location and click the OK button. Visual Studio will now create a standard Web Forms application. In this example I’m using the .Net 4.0 framework although older versions will work as well (up to 2.0).

When our project is created it will look like this:

As demo we’ll create a simple application that allows the user to add a book to his wish list. The user has to fill his favorite book title. After pressing add we’ll show the added book in a list underneath. The user can add as many book titles as he wishes. Let’s start with updating the Default.aspx page with some text and a textbox where the user can add the book title. Under this textbox we place a button to add the title to the list and the list itself. As you can see this is a VERY simple application where the emphasis lies on the creation of the Ajax call, not the application itself.

<%@ Page Title="Home Page" Language="C#" MasterPageFile="~/Site.master" AutoEventWireup="true"
    CodeBehind="Default.aspx.cs" Inherits="Demo._Default" ClientIDMode="Static"  %>

<asp:Content ID="HeaderContent" runat="server" ContentPlaceHolderID="HeadContent">

</asp:Content>
<asp:Content ID="BodyContent" runat="server" ContentPlaceHolderID="MainContent">
  <h2>
        Welcome to ASP.NET!
    </h2>
    <p>
        Enter your book title for your wish list
    </p>
    <asp:TextBox runat="server" ID="txtBookTitle" Width="200"></asp:TextBox>
    <asp:Button runat="server" ID="btnAddBookTitle" Text="Add book title" /><br/>
    <asp:ListBox runat="server" ID="lstBookTitles"></asp:ListBox>

</asp:Content>

One side note: I declared the ClientIDMode Static in the page directive. This will be necessary to implement the jQuery with the same id’s we have given the controls in the aspx page. More info on this blog post of Scot Guthrie.

Our fabulous application now should look like the image below.

Add our business object

In our application we are going to use a class to store our book title information in. In the root of the application add a class. Name this class Book and add the following properties so our class looks like this:

using System;
using System.Collections.Generic;
using System.Linq;
using System.Web;

namespace Demo
{
    public class Book
    {
        public long BooktitleId { get; set; }
        public string BookTitle { get; set; }
    }
}

Reference and create javascript files

In the solution explorer right click on the Scripts folder and choose Add => New item. In the window that appears select a JScript file, name it Default.aspx.js and click ok. Open up our Default.aspx page and add following lines in the HeaderContent block:

<asp:Content ID="HeaderContent" runat="server" ContentPlaceHolderID="HeadContent">
    <script src="Scripts/jquery-1.4.1.min.js" type="text/javascript"></script>
    <script src="Scripts/Default.aspx.js" type="text/javascript"></script>
</asp:Content>

This will add the jQuery library and our own created javascript file to the project.

Now we’re ready to start coding.

Create Web Method

To access our code behind file from javascript we have to add a WebMethod. Open up the Default.aspx.cs code file and create the following method:

        public static long AddBook(string bookTitle)
        {

        }

Above these method we can add an annotation to tell the framework we want to access this method directly. Therefor we need the System.Web.Services namespace. Add this namespace in our using declarations:

using System.Web.Services;

Above the method Add Book add [WebMethod(EnableSession = true)]

        [WebMethod(EnableSession = true)]
        public static long AddBook(string bookTitle)
        {

        }

Now we can create the method body. It’s not that much work, we’re going to store the added book titles in a session object.

        [WebMethod(EnableSession = true)]
        public static long AddBook(string bookTitle)
        {
            List<Book> books;
            if (HttpContext.Current.Session[sessionName] != null)
            {
                books = HttpContext.Current.Session[sessionName] as List<Book>;
                if (books == null)
                    books = new List<Book>();
            }
            else
            {
                books = new List<Book>();
            }
            Book book = new Book() { BooktitleId = GetNextBookTitleId(), BookTitle = bookTitle };
            books.Add(book);
            HttpContext.Current.Session[sessionName] = books;
            return book.BooktitleId;
        }

        private static long GetNextBookTitleId()
        {
            if (HttpContext.Current.Session[sessionName] != null)
            {
                List<Book> books = HttpContext.Current.Session[sessionName] as List<Book>;
                if (books != null)
                {
                    long ticket = books.Max(t => t.BooktitleId);
                    ticket++;
                    return ticket;
                }
            }
            return 1;
        }

I’ve created a helper method to get the next available Id so our list can’t contain the same id twice. Build your application and hit Run. Our Default page should open in a browser window without any changes.

Creating our Ajax call in jQuery

Open up the Default.aspx.js file we created. In this file we will add an event handler on the submit button. When the button is clicked we’ll call the code behind method and add the title to the list stored in the session variable. Add the following lines to the file and run the application.

$(document).ready(function () {
    $("#btnAddBookTitle").click(function () {
        alert('Button is clicked !!');
        return false;
    });
});

When you click the “Add book title” button a javascript popup will appear. The return false line will stop the page from executing a post back as we are going to call a ajax method instead.

Adding the ajax call is not more than a few lines:

$(document).ready(function () {
    $("#btnAddBookTitle").click(function () {
        var $bookTitle = $("#txtBookTitle").val();
        $.ajax({
            type: "POST",
            url: "Default.aspx/AddBook",
            data: "{ 'bookTitle':'" + $bookTitle + "' }",
            contentType: "application/json; charset=utf-8",
            dataType: "json",
            success: function (msg) {
            },
            error: function () {
                alert('Error calling AddBook');
            }
        });
        return false;
    });
});

We’ve added a variable $booktitle where we fetch the title that our user has entered in the textbox. After that line we start the ajax call. There are a few settings we’ve got to set before the call will work:

  • Type: can be POST or GET, in this case: POST
  • url: The url where the values should be posted to: the page name + the method name (“Default.aspx/AddBook”)
  • The data: we have to send the booktitle to our code behind method. This we will rap in a JSON format (more info on http://www.json.org)
  • ContentType: We declare we want to use JSON to communicate with the server
  • Datatype: We declare we want to use JSON to receive data from the server
  • Success: what we have to do when the call is succeeded (not filled out yet)
  • Error: what we have to do when the call throws an error.(alerting a message box in this case)

This is all we have to add to contact our code behind method. If you run the application and open up Firebug in firefox or the developer tools in Internet Explorer 9 or the developer tools in Google Chrome well see in the NET tab we make a async call to the server and receive the id of the book title we’ve added.

Response: {"d":4}

Implement success function

All we have to do now is add this data to our list view. Therefor we’ll have to implement the success function in our ajax call:

            success: function (msg) {
                var $bookId = msg.d;
                var $option = new Option($bookTitle, $bookId);
                $("#lstBookTitles").append($option);
            }

We create a variable $bookId to store the id in we receive from the server. As you can see the return message is wrapped in a “d” variable. This is changed in the .NET 3.5 version. More info in Dave Ward’s post on Encosia.
After that we create an option to be added in the listbox and append it to this box.

If we run the application now well see that every time a book title is added, it’s send asynchronously to the server. We receive an id from the server and the book title is added to the listbox.

Next post will be about implementing AJAX calls in ASP.NET MVC 3 project.

Why using jQuery for AJAX calls before the Ajax Control Toolkit

Every starting developer in ASP.NET who wanted to integrate AJAX functionality in his web application first started with the Ajax Control Toolkit. It’s easy to understand, in Web Forms it’s almost not more than a drag and drop implementation.

After a while you start to notice the limitations. You want to create a functionality that’s not integrated in the toolkit. You start with extending methods, extending properties and get stuck every time again. The amount of update panels start to grow above your head and on every postback you’re have to test if the postback is a Ajax post back or not. In your UI you start to see some disadvantages, the focus is lost when a update panel is updated, you’re page jumps back to the top and so one.

One of the most disturbing issues I found was the load from and to the server. For a simple update of a textbox, the whole content of the update panel is send in the background to update your page. In the first screenshot you see a (very) simple example. The value typed into the textbox has to be added to the list underneath without submitting the page. After creating the update panel and added a script manager we implemented the async postback.

The only thing we needed back from the server is the ID of the value entered and the value itself (although that isn’t needed to make a round trip) I we check the Console or Net tab in Firbug we see the response:

1|#||4|471|updatePanel|UpdatePanel1| <span id="lblFirstName">Bart</span><br /> <span id="lblLastName">De Meyer</span><br /> <span id="Label1">Ticket</span><br /> <input name="txtTicket" type="text" id="txtTicket" /><br /> <input type="submit" name="btnSave" value="Save" id="btnSave" /><br /> <select size="4" name="lstTickets" id="lstTickets">     <option value="1">aaaa</option> </select> |148|hiddenField|__VIEWSTATE|/wEPDwUJNTU0OTM3MDUxD2QWAgIDD2QWAgI DD2QWAmYPZBYCAgsPEA8WAh4LXyFEYXRhQm91bm RnZBAVAQRhYWFhFQEBMRQrAwFn ZGRkfXCqCy7IiEyl+lHROA5vfn1oYNq3t8MhnzZlEt DTPXA=|80|hiddenField |__EVENTVALIDATION|/wEWBALF19m3BALEsPqoBgKct7iSDAKjn6ufDly+66xedWvvj /fQnBQjlOsBTWNL9UuTy1VDVvKmkOGe |15|asyncPostBackControlIDs|| btnSave,btnSave|0|postBackControlIDs|||26|updatePanelIDs||  tUpdatePanel1,UpdatePanel1|0| childUpdatePanelIDs|||25| panelsToRefreshIDs|| UpdatePanel1,UpdatePanel1|2| asyncPostBackTimeout||90|16|formAction||UpdatePanel.aspx| 

A 1024 character response, including all controls that are in the update panel.

For test, I’ve implemented the same functionality with an Ajax call with jQuery. Check the response:

{"d":{"__type":"Webform.Object.Ticket","TickedId":3,"TicketName":"aaaa"}} 

A 73 character response, only containing the values we needed: the id of the value entered and the value entered

As you can see in this (very) simple example, the difference between the implementing a async callback with the toolkit and jQuery gives us an advantage of 951 characters. You can imagine what the difference would be in a page with let’s say 50 controls on their.

For simple Ajax functionality the toolkit is an excellent choice for a beginning developer. A developer who doesn’t want to know what’s going on in the background. He updates a drop down list and the correct value appears in the textbox underneath. What triggered it and how it’s used, he (or she) doesn’t care. They still maintain and renew the toolkit as you can see on Stephen Walter’s blog.

I do care. I’m one of those guys who want to know what’s going on in the background, so I can extend functionality, create my own controls and so one. And I do care about the traffic I generate.