After the previous post (Why using jQuery for AJAX calls before the Ajax Control Toolkit)we going to see in this post how you can set up a Web Forms project and how you can easily can create Ajax calls to your code behind.
Setting up the project
Open Visual Studio and create a new ASP.NET Web Application.
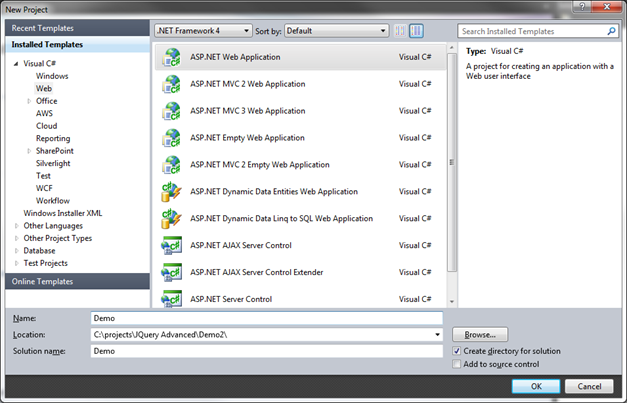
Enter a name and a location and click the OK button. Visual Studio will now create a standard Web Forms application. In this example I’m using the .Net 4.0 framework although older versions will work as well (up to 2.0).
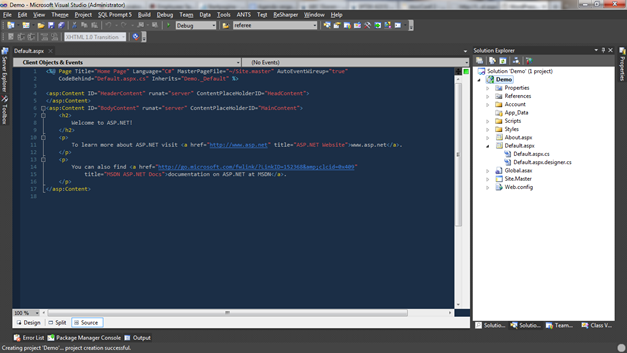
When our project is created it will look like this:
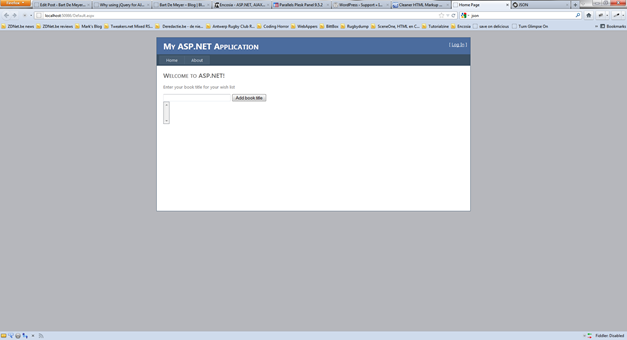
As demo we’ll create a simple application that allows the user to add a book to his wish list. The user has to fill his favorite book title. After pressing add we’ll show the added book in a list underneath. The user can add as many book titles as he wishes. Let’s start with updating the Default.aspx page with some text and a textbox where the user can add the book title. Under this textbox we place a button to add the title to the list and the list itself. As you can see this is a VERY simple application where the emphasis lies on the creation of the Ajax call, not the application itself.
<%@ Page Title="Home Page" Language="C#" MasterPageFile="~/Site.master" AutoEventWireup="true"
    CodeBehind="Default.aspx.cs" Inherits="Demo._Default" ClientIDMode="Static"  %>

<asp:Content ID="HeaderContent" runat="server" ContentPlaceHolderID="HeadContent">

</asp:Content>
<asp:Content ID="BodyContent" runat="server" ContentPlaceHolderID="MainContent">
  <h2>
        Welcome to ASP.NET!
    </h2>
    <p>
        Enter your book title for your wish list
    </p>
    <asp:TextBox runat="server" ID="txtBookTitle" Width="200"></asp:TextBox>
    <asp:Button runat="server" ID="btnAddBookTitle" Text="Add book title" /><br/>
    <asp:ListBox runat="server" ID="lstBookTitles"></asp:ListBox>

</asp:Content>
One side note: I declared the ClientIDMode Static in the page directive. This will be necessary to implement the jQuery with the same id’s we have given the controls in the aspx page. More info on this blog post of Scot Guthrie.
Our fabulous application now should look like the image below.
Add our business object
In our application we are going to use a class to store our book title information in. In the root of the application add a class. Name this class Book and add the following properties so our class looks like this:
using System;
using System.Collections.Generic;
using System.Linq;
using System.Web;

namespace Demo
{
    public class Book
    {
        public long BooktitleId { get; set; }
        public string BookTitle { get; set; }
    }
}
Reference and create javascript files
In the solution explorer right click on the Scripts folder and choose Add => New item. In the window that appears select a JScript file, name it Default.aspx.js and click ok. Open up our Default.aspx page and add following lines in the HeaderContent block:
<asp:Content ID="HeaderContent" runat="server" ContentPlaceHolderID="HeadContent">
    <script src="Scripts/jquery-1.4.1.min.js" type="text/javascript"></script>
    <script src="Scripts/Default.aspx.js" type="text/javascript"></script>
</asp:Content>
This will add the jQuery library and our own created javascript file to the project.
Now we’re ready to start coding.
Create Web Method
To access our code behind file from javascript we have to add a WebMethod. Open up the Default.aspx.cs code file and create the following method:
        public static long AddBook(string bookTitle)
        {

        }
Above these method we can add an annotation to tell the framework we want to access this method directly. Therefor we need the System.Web.Services namespace. Add this namespace in our using declarations:
using System.Web.Services;
Above the method Add Book add [WebMethod(EnableSession = true)]
        [WebMethod(EnableSession = true)]
        public static long AddBook(string bookTitle)
        {

        }
Now we can create the method body. It’s not that much work, we’re going to store the added book titles in a session object.
        [WebMethod(EnableSession = true)]
        public static long AddBook(string bookTitle)
        {
            List<Book> books;
            if (HttpContext.Current.Session[sessionName] != null)
            {
                books = HttpContext.Current.Session[sessionName] as List<Book>;
                if (books == null)
                    books = new List<Book>();
            }
            else
            {
                books = new List<Book>();
            }
            Book book = new Book() { BooktitleId = GetNextBookTitleId(), BookTitle = bookTitle };
            books.Add(book);
            HttpContext.Current.Session[sessionName] = books;
            return book.BooktitleId;
        }

        private static long GetNextBookTitleId()
        {
            if (HttpContext.Current.Session[sessionName] != null)
            {
                List<Book> books = HttpContext.Current.Session[sessionName] as List<Book>;
                if (books != null)
                {
                    long ticket = books.Max(t => t.BooktitleId);
                    ticket++;
                    return ticket;
                }
            }
            return 1;
        }
I’ve created a helper method to get the next available Id so our list can’t contain the same id twice. Build your application and hit Run. Our Default page should open in a browser window without any changes.
Creating our Ajax call in jQuery
Open up the Default.aspx.js file we created. In this file we will add an event handler on the submit button. When the button is clicked we’ll call the code behind method and add the title to the list stored in the session variable. Add the following lines to the file and run the application.
$(document).ready(function () {
    $("#btnAddBookTitle").click(function () {
        alert('Button is clicked !!');
        return false;
    });
});
When you click the “Add book title” button a javascript popup will appear. The return false line will stop the page from executing a post back as we are going to call a ajax method instead.
Adding the ajax call is not more than a few lines:
$(document).ready(function () {
    $("#btnAddBookTitle").click(function () {
        var $bookTitle = $("#txtBookTitle").val();
        $.ajax({
            type: "POST",
            url: "Default.aspx/AddBook",
            data: "{ 'bookTitle':'" + $bookTitle + "' }",
            contentType: "application/json; charset=utf-8",
            dataType: "json",
            success: function (msg) {
            },
            error: function () {
                alert('Error calling AddBook');
            }
        });
        return false;
    });
});
We’ve added a variable $booktitle where we fetch the title that our user has entered in the textbox. After that line we start the ajax call. There are a few settings we’ve got to set before the call will work:
- Type: can be POST or GET, in this case: POST
- url: The url where the values should be posted to: the page name + the method name (“Default.aspx/AddBook”)
- The data: we have to send the booktitle to our code behind method. This we will rap in a JSON format (more info on http://www.json.org)
- ContentType: We declare we want to use JSON to communicate with the server
- Datatype: We declare we want to use JSON to receive data from the server
- Success: what we have to do when the call is succeeded (not filled out yet)
- Error: what we have to do when the call throws an error.(alerting a message box in this case)
This is all we have to add to contact our code behind method. If you run the application and open up Firebug in firefox or the developer tools in Internet Explorer 9 or the developer tools in Google Chrome well see in the NET tab we make a async call to the server and receive the id of the book title we’ve added.
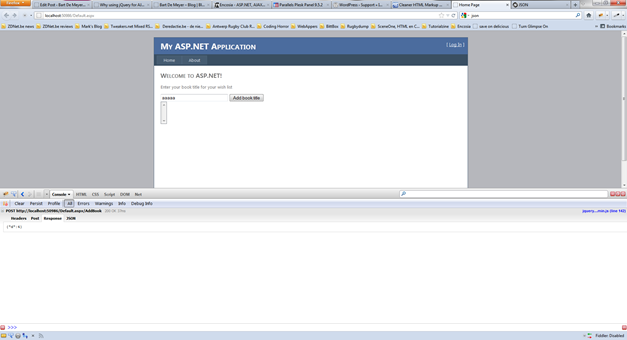
Response: {"d":4}
Implement success function
All we have to do now is add this data to our list view. Therefor we’ll have to implement the success function in our ajax call:
            success: function (msg) {
                var $bookId = msg.d;
                var $option = new Option($bookTitle, $bookId);
                $("#lstBookTitles").append($option);
            }
We create a variable $bookId to store the id in we receive from the server. As you can see the return message is wrapped in a “d” variable. This is changed in the .NET 3.5 version. More info in Dave Ward’s post on Encosia.
After that we create an option to be added in the listbox and append it to this box.
If we run the application now well see that every time a book title is added, it’s send asynchronously to the server. We receive an id from the server and the book title is added to the listbox.
Next post will be about implementing AJAX calls in ASP.NET MVC 3 project.